
If you love chocolate, this eggless molten choco lava cake is a dream come true! It’s rich, fudgy, and has the most irresistible gooey centre. Super easy to make and ready in minutes perfect for when you need a quick chocolate fix!
Why you will love this recipe?
This eggless molten lava cake is pure chocolate heaven, rich, and fudgy. It’s easy to make and guaranteed to satisfy your sweet cravings. You’re going to love it because it has everything a chocolate dessert should have, packed with gooey goodness in every bite. No eggs and no complicated steps, just pure chocolate bliss in under 15 minutes.

Expert Tips for Best results!
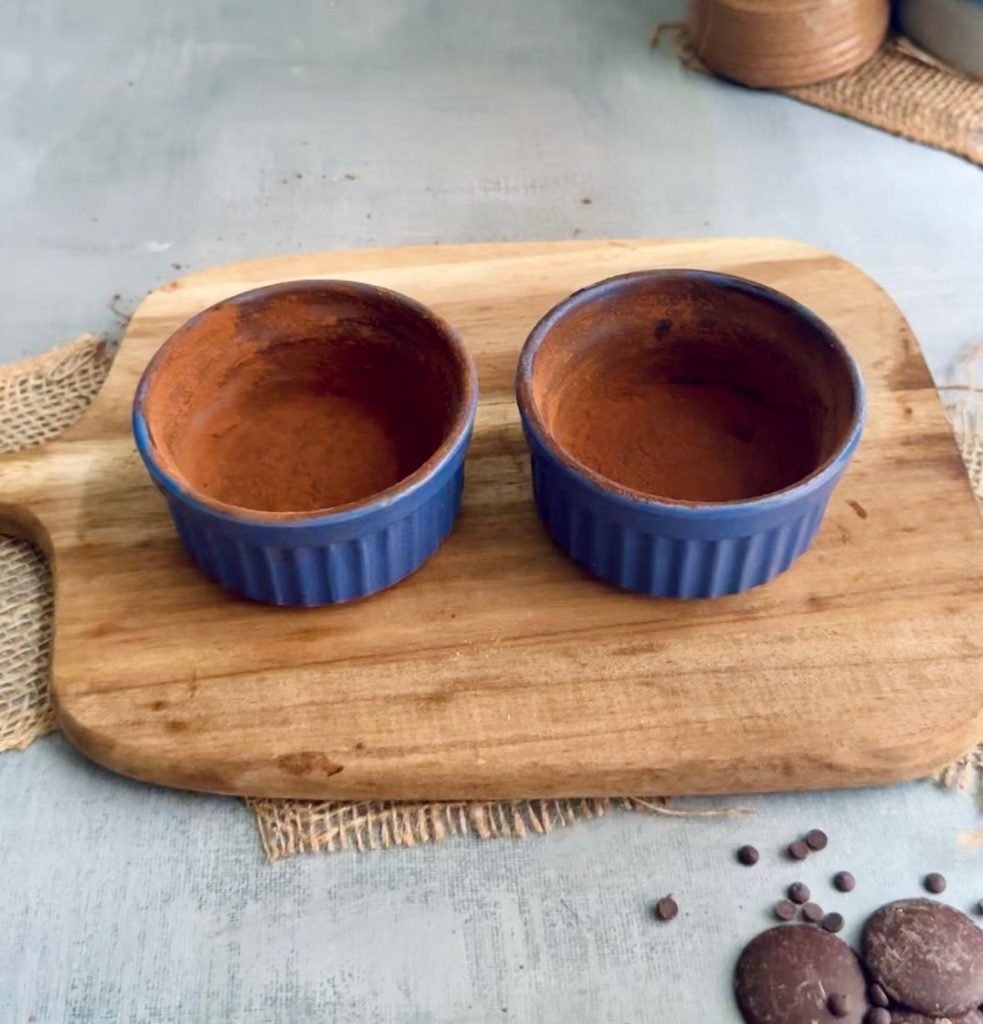
- Grease the ramekins well – You don’t want your cake sticking to the sides! Butter and cocoa powder work best to keep that smooth chocolatey finish.
- Use good quality chocolate – Since chocolate is the star, pick a rich, dark chocolate for the best flavour and gooey texture.
- Don’t overmix the batter – Mix just until everything is combined. Overmixing can make the cake dense instead of soft and fudgy
- Watch the bake time – Every oven is different, so check around 8 minutes. The edges should be set, but the centre should still be soft and gooey.
- Let it rest for a minute – Once out of the oven, give it a minute to settle before digging in. This helps it hold its shape while keeping that molten centre.
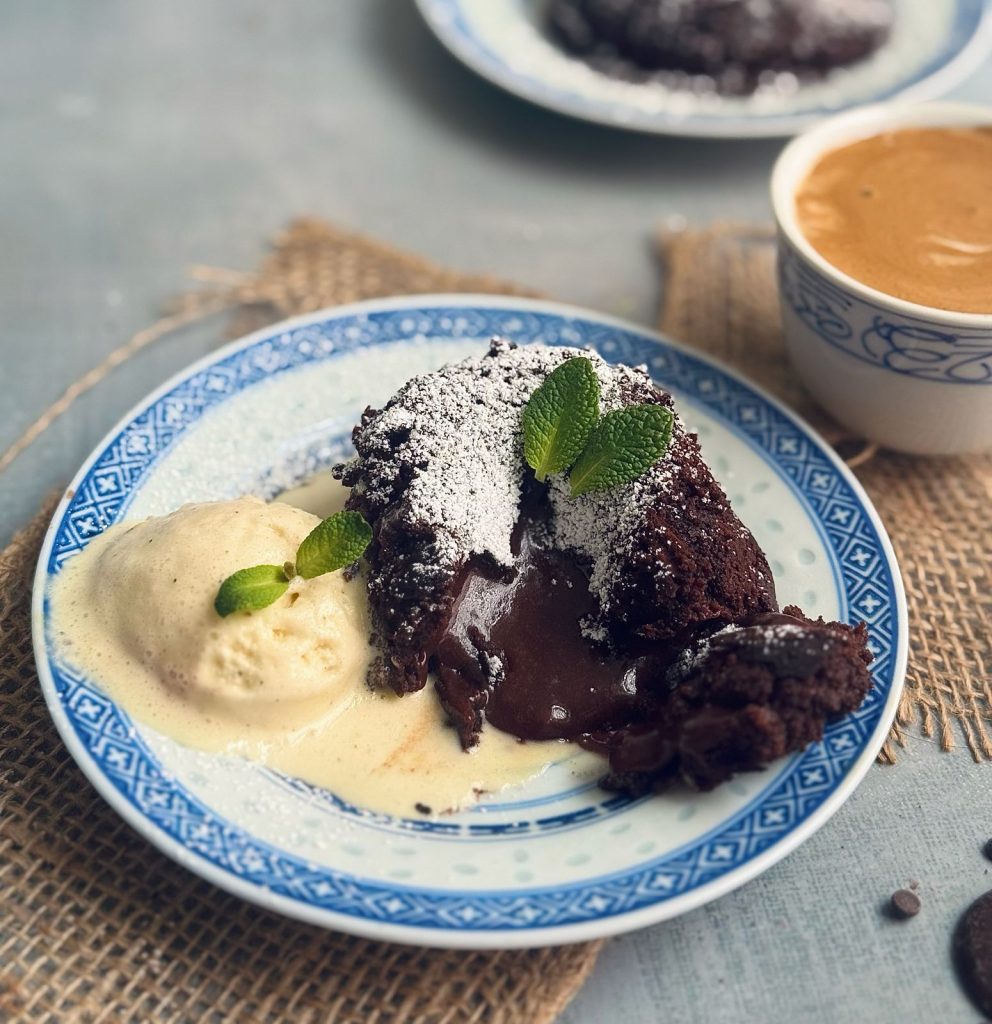
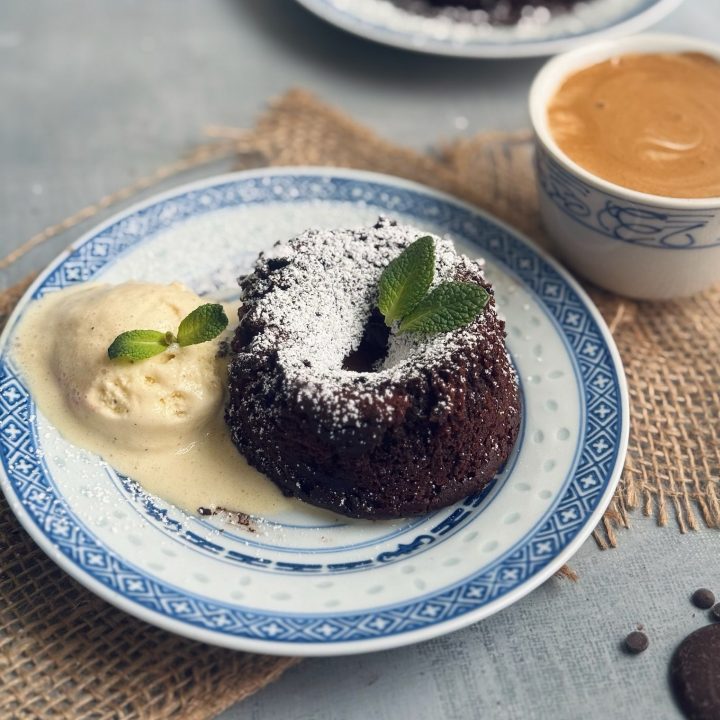
- Serve immediately – These cakes are best enjoyed warm when the centre is perfectly melty. Pair with ice cream or dust with powdered sugar for extra indulgence. The chocolate melts beautifully, creating those irresistible gooey puddles in every bite.
How to make Eggless Molten Choco Lava Cake?


Step 1: Mix Dry Ingredients
In a bowl, whisk together the all-purpose flour, cocoa powder, baking powder, baking soda, salt, and sugar.
Step 2: Prep the Ramekins
Grease 4 ramekins with butter and dust them with cocoa powder to prevent sticking. Set them aside and beat with an electric mixer until light and fluffy, about 2-3 minutes.
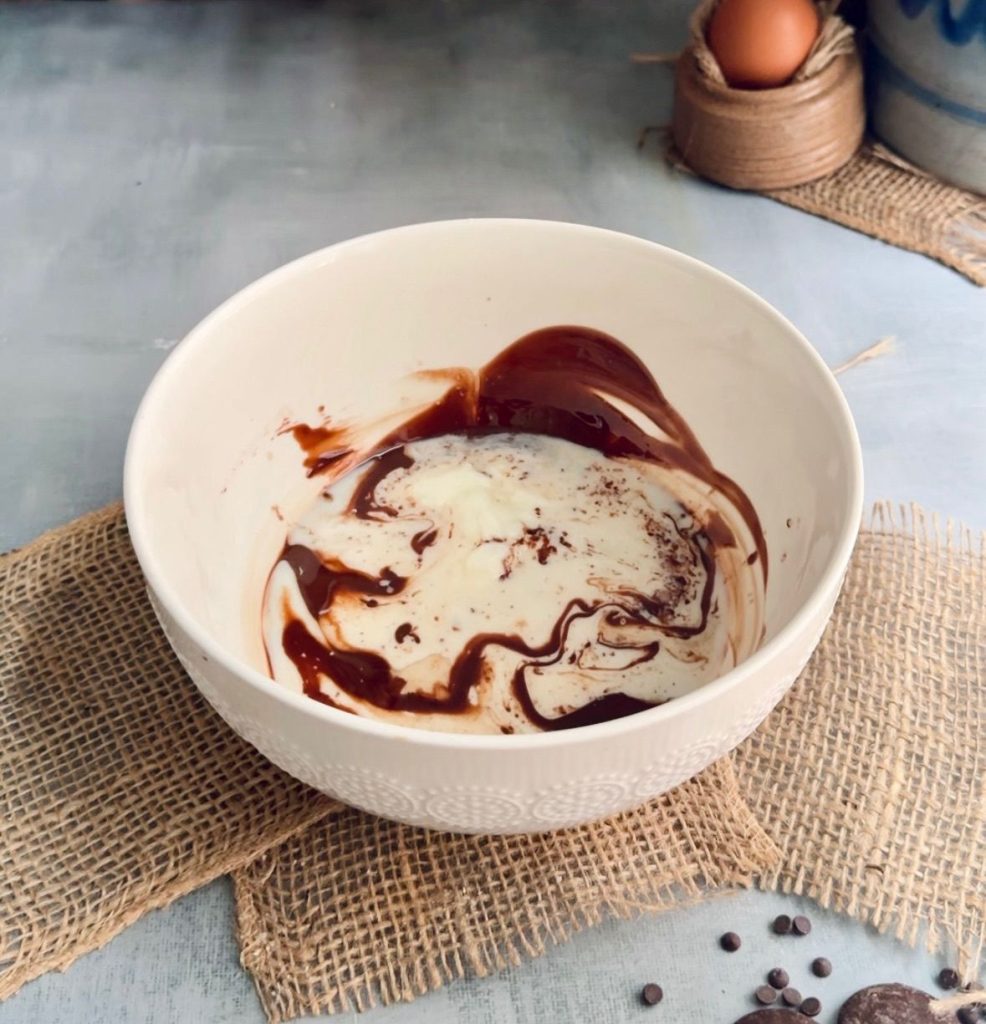
Step 3: Melt the Chocolate & Butter
In a microwave-safe bowl, melt the butter and dark chocolate in 20-second intervals, stirring in between until smooth.
Step 4: Combine the Wet Ingredients
Once the melted chocolate mixture has cooled slightly, add oil, vanilla extract, milk, and yogurt. Mix well until smooth.
Step 5: Make the Batter
Gradually fold the dry ingredients into the wet ingredients. Stir gently until just combined don’t overmix!
Step 6: Fill the Ramekins
Evenly divide the batter among the prepared ramekins, filling them about 3/4 of the way full.
Step 7: Bake to Perfection
Bake in a preheated oven at 200°C for 10-12 minutes. Start checking around 8-9 minutes. The edges should be set while the centre remains soft and gooey for the best results.
Step 8: Serve & Enjoy!
Let the cake rests for a minute before running a knife around the edges to loosen them. Serve warm with ice cream or a dusting of powdered sugar, and enjoy that rich, molten centre!
Frequently Asked Questions
Can I make this without an oven?
Yes! You can bake these in an air fryer at 180°C for about 7-8 minutes. You can also try steaming them, but they might not have the same molten centre.
How do I know when my lava cake is perfectly baked?
The edges should be set, but the centre should still look soft and slightly jiggly. A toothpick inserted into the sides should come out with crumbs, while the middle remains gooey. You can refrigerate the cakes for up to 24 hours before baking.
How should I store eggless molten lava cake?
Eggless molten lava cakes are best enjoyed fresh while the centre is warm and gooey. If you need to store them, unbaked batter can be poured into greased ramekins, covered tightly, and refrigerated for up to 24 hours. Baked lava cakes should be allowed to cool completely, then covered and stored in the refrigerator for up to two days. When reheating, use an oven or air fryer until just warm. Avoid microwaving, as it can overcook the centre and affect the texture.
Can I freeze eggless molten choco lava cake?
Yes, eggless molten lava cake can be frozen, especially before baking. To freeze before baking, prepare the batter, pour it into greased ramekins, cover well, and freeze for up to 15 days. When ready to bake, let the ramekins sit at room temperature for 10–15 minutes, then bake, adding one to two extra minutes if needed. Baked lava cakes can also be frozen for up to one week, but the centre may be less molten when reheated. Reheat gently in a preheated oven for best results.
Watch How to Make it!
Press play to see this recipe step by step. And don’t forget to subscribe for more baking videos!
Recipe Card
Eggless Molten Choco Lava Cake
This eggless molten lava cake is rich, fudgy, and loaded with a gooey chocolate centre. It’s quick to make with simple ingredients and ready in just 10 minutes. Serve it warm with ice cream for a decadent treat!
Ingredients
- 1/2 cup All Purpose flour (65g)
- 1/2 cup + 1 tbsp white caster sugar (112g)
- 4 tbsp cocoa powder
- 1/4 tsp salt
- 1/2 tsp baking powder
- 1/4 tsp baking soda
- 2 tbsp melted butter (30g)
- 2 tbsp oil (30ml)
- 1 tsp vanilla
- 1/2 cup (120ml) milk
- 1/4 cup (60g) yogurt
- 1/4 cup (60g) dark chocolate
Instructions
1. Grease 4 ramekins with butter and dust them with cocoa powder. Set them aside.
2. In a bowl, whisk together flour, cocoa powder, baking powder, baking soda, salt, and sugar.
3. In a microwave safe bowl, melt butter and chocolate in 20 second intervals, stirring until smooth.
4. Let the mixture cool slightly, then add oil, vanilla, milk, and yogurt. Mix well.
5. Gradually fold in the dry ingredients, stirring gently until just combined.
6. Divide the batter evenly among the prepared ramekins.
7. Bake in a preheated oven at 200°C for 10-12 minutes, checking after 8-9 minutes.
8.The sides should be set, while the centre remains gooey. Serve warm and enjoy!