
Why you will love this recipe?
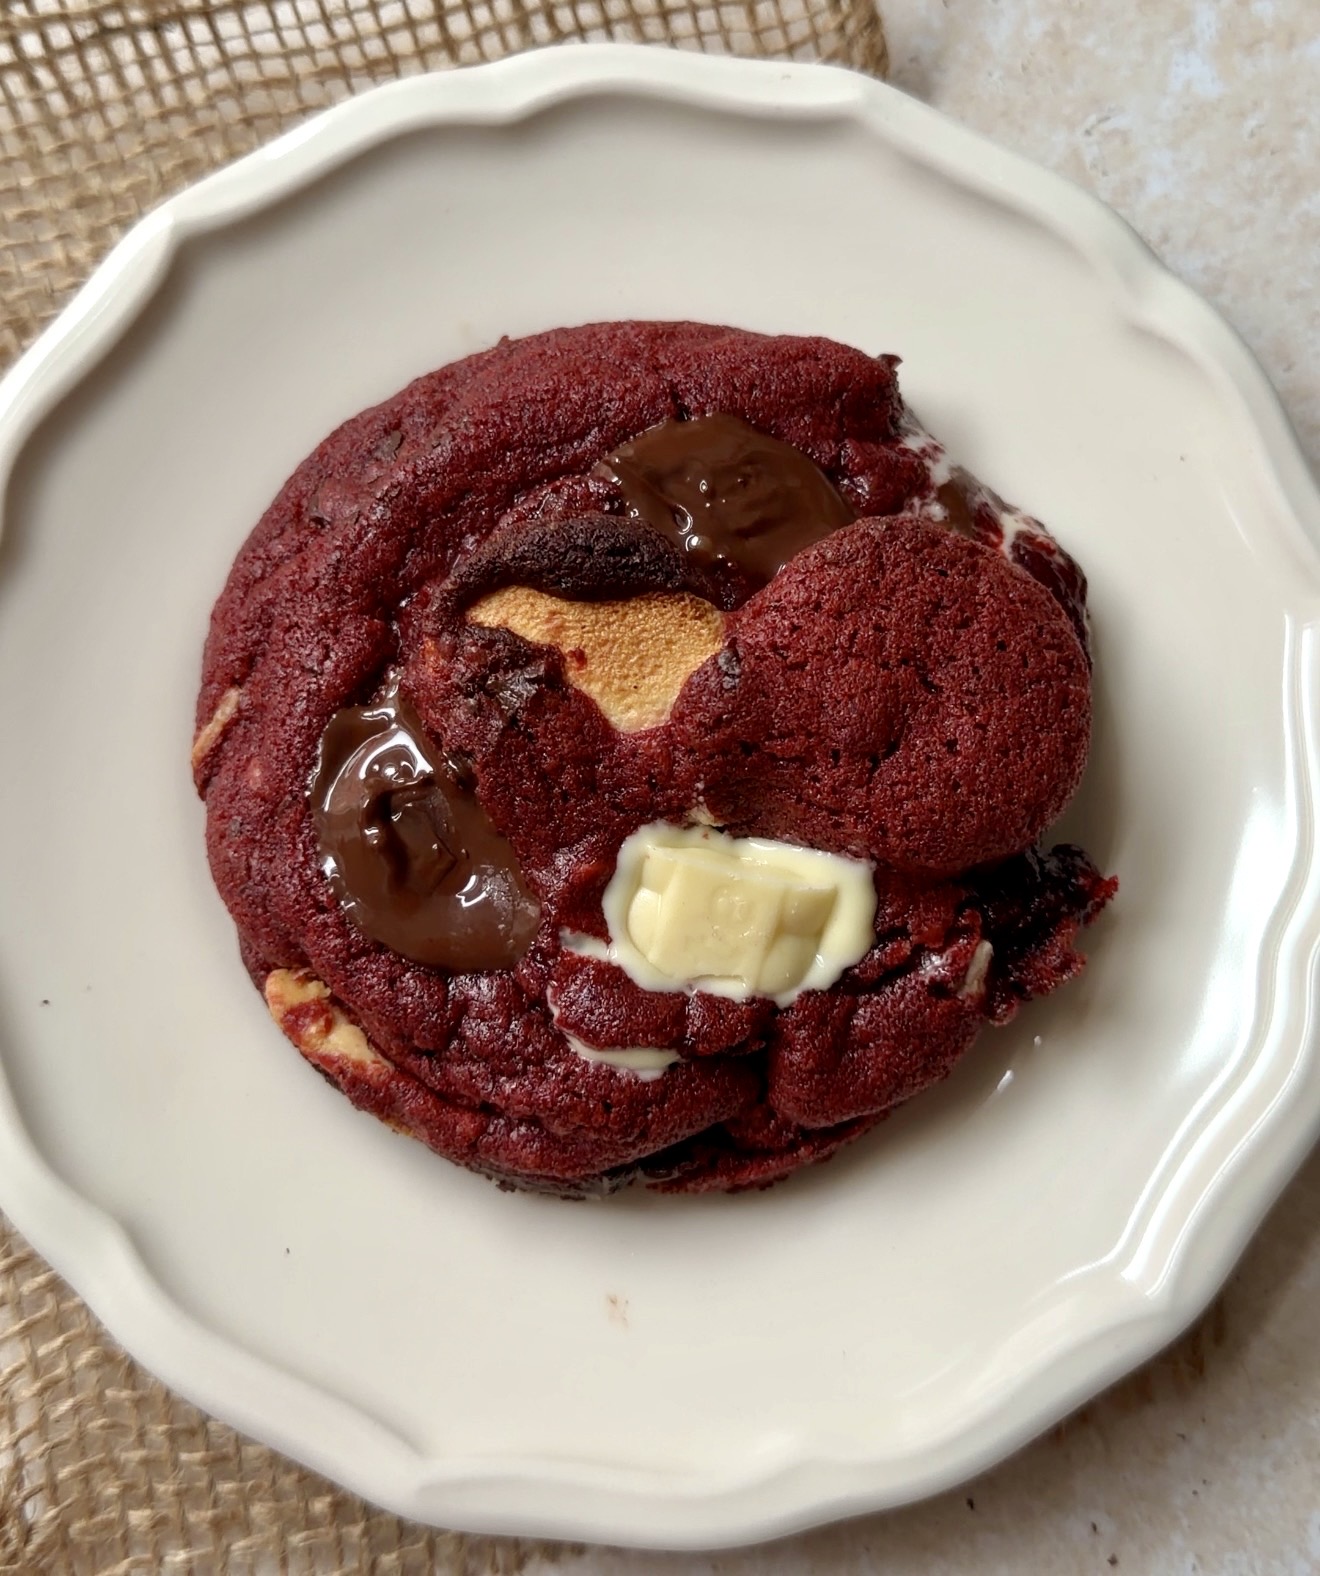
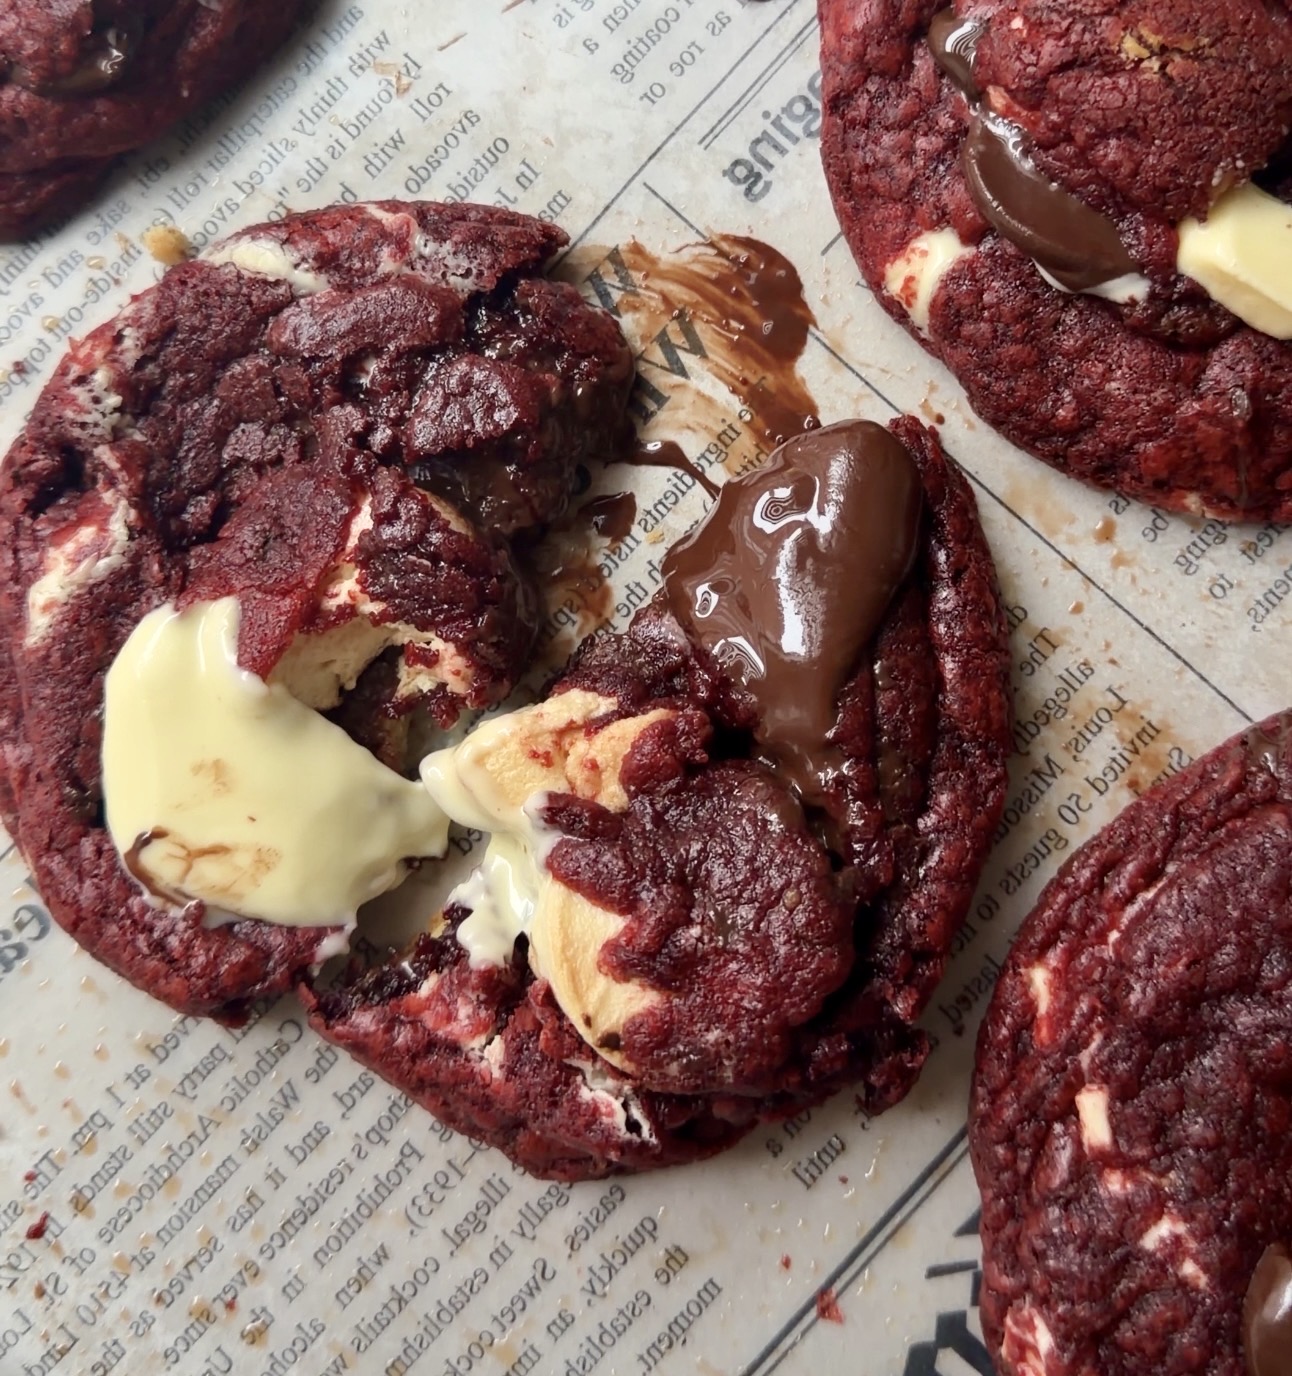
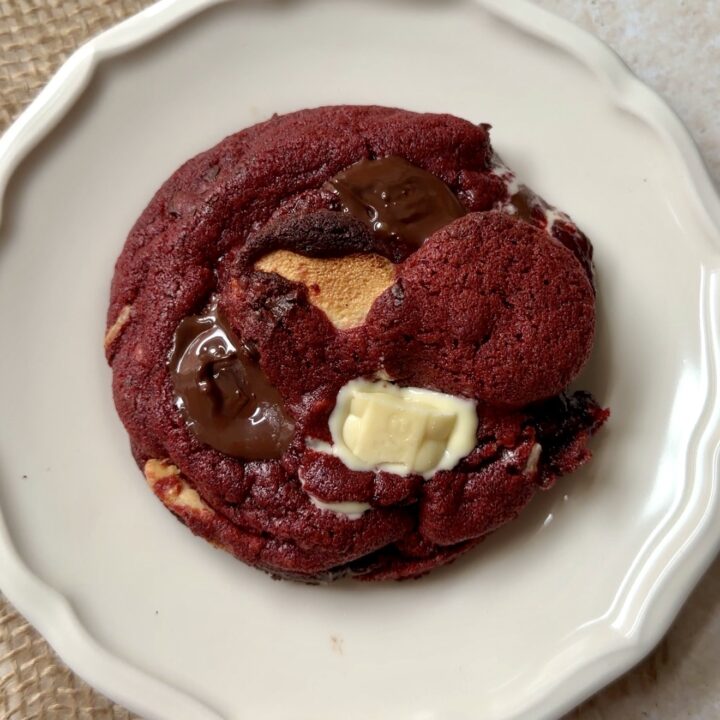
I’m so excited to share these Red Velvet S’mores Cookies with you! I wish you could taste them from the screen (hehe!). They’re soft, chewy, and just a little bit indulgent ,everything you want in a cookie. And my secret ingredient? Brown Butter, yes it just makes these extra special and flavourful. And did I mention about the pools of melty chocolate from dark and white chocolate chunks? And Oh yes, the melty marshmallows and graham crackers too? I think I have done enough convincing, just make them OKAY?
Expert Tips for Best results!
- Chopped chocolate makes it 100 times better: I prefer chopping a good-quality chocolate bar instead of using chips. This gives you those perfect little puddles of melty chocolate in every bite.
- Baking time: I always bake one cookie first to test. This way, you’ll see exactly how long your cookies need so you don’t overbake the batch.
- Slightly underbake for gooey centres: Take them out when the edges are set but the centres are still soft , that’s the sweet spot for a chewy, gooey middle.
- Brown butter tip: If you’re browning the butter, let it cool slightly before adding the sugar. This helps the cookies stay soft and gives a rich, caramel-y flavor.
How to make Red Velvet S’mores Cookies?
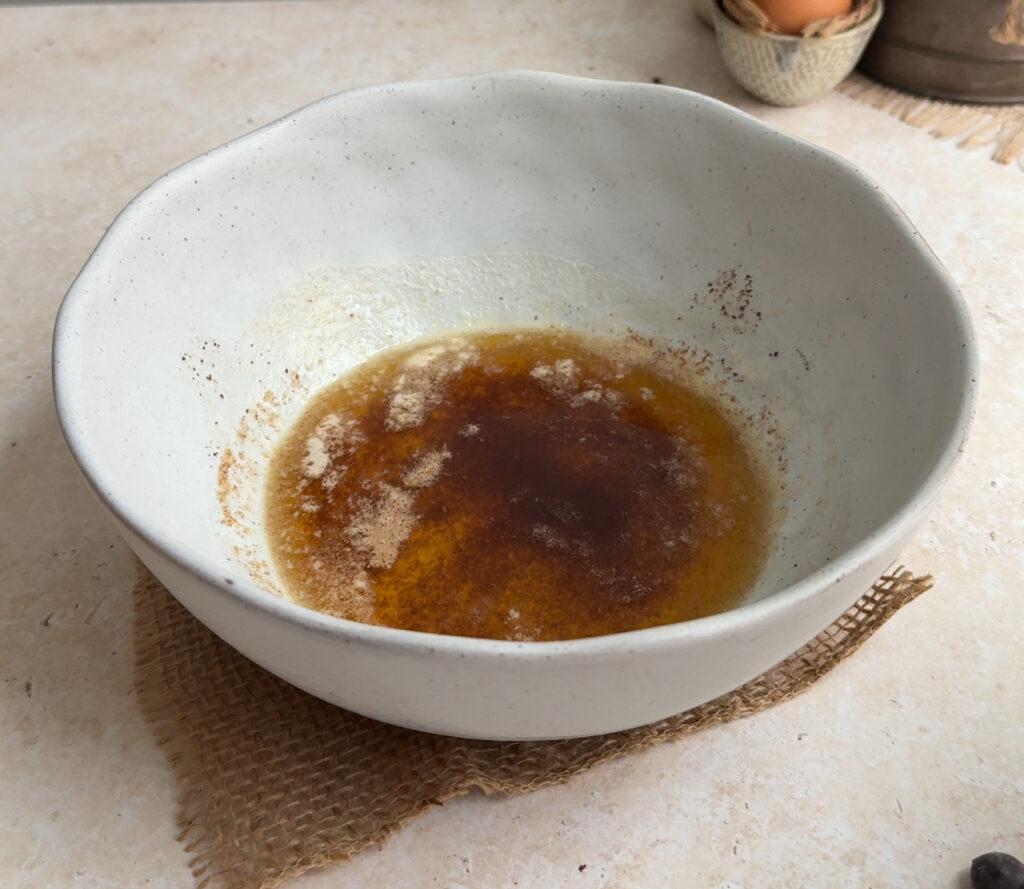
Step 1: Brown the Butter
Start by gently browning the butter in a small pan over medium heat. Stir frequently so it doesn’t burn. Once it turns golden with a nutty aroma, remove it from the heat and transfer to a heat proof bowl. Let it cool slightly before adding sugar.
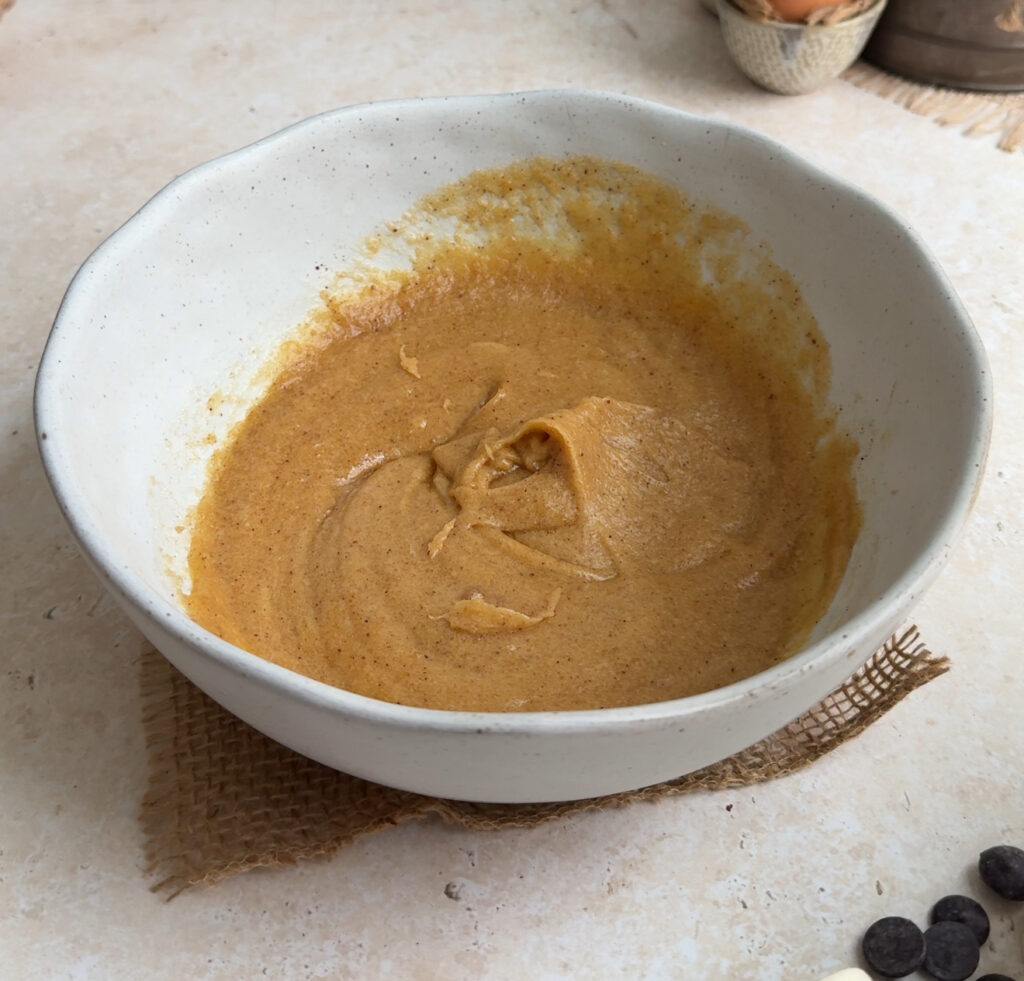
Step 2: Combine the Sugars and Butter
In the mixing bowl, add he soft brown sugar and white sugar. Mix them with butter.
Step 3: Add Egg, Vanilla, and Food Colouring
Add the room-temperature egg and vanilla extract to the sugar-butter mixture and mix until combined. Then add the red gel food coloring and blend until your dough is a consistent and vibrant red.
Step 4: Mix Dry Ingredients
In a separate bowl, whisk together the flour, cocoa powder, baking soda, baking powder, cornstarch, and salt. Make sure everything is evenly distributed this will give your cookies a consistent texture. And if you don’t want to dirty another bowl just sift all the dry ingredients together in the batter bowl.
Step 5: Combine Wet and Dry Ingredients
Gradually add the dry ingredients to the wet mixture, folding gently until just combined. Be careful not to overmix, or the cookies may become dense.
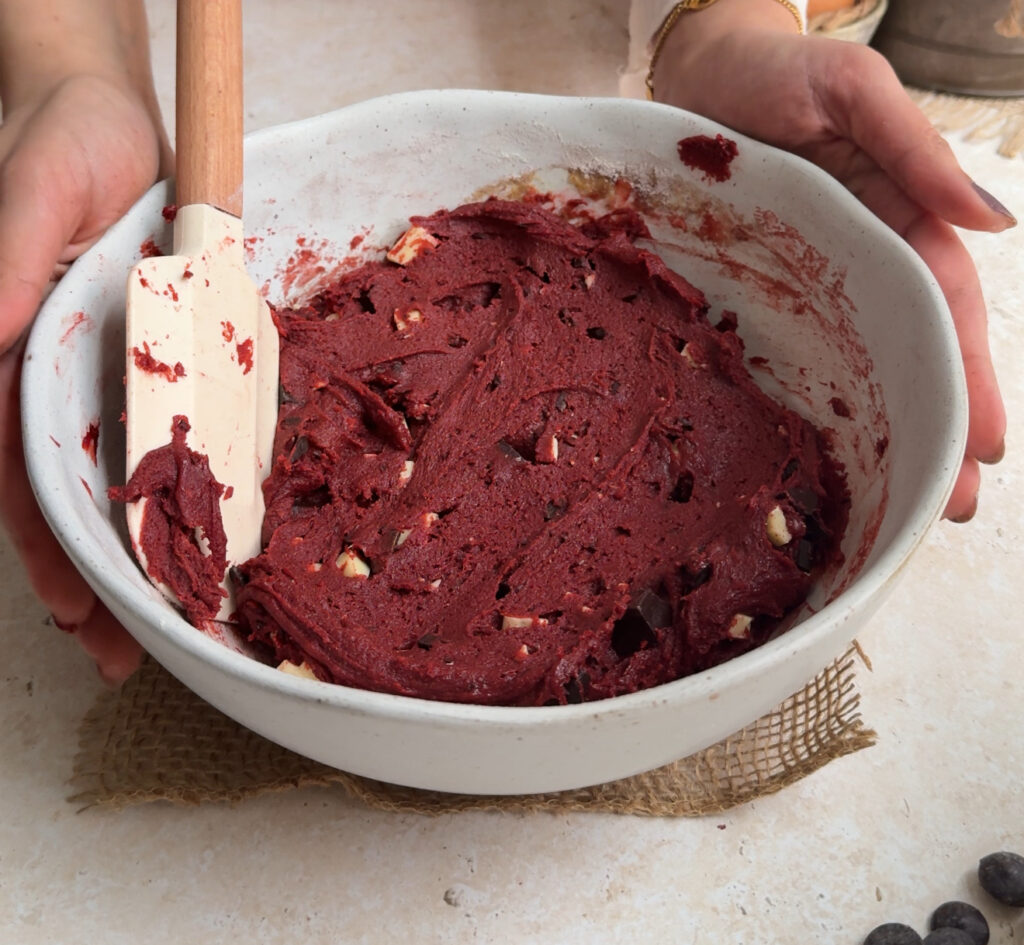
Step 6: Fold in Chocolate
Chop your white and semi sweet chocolate bar into chunks and fold it into the dough. Now let the cookie dough rest for 30 minutes in the fridge.
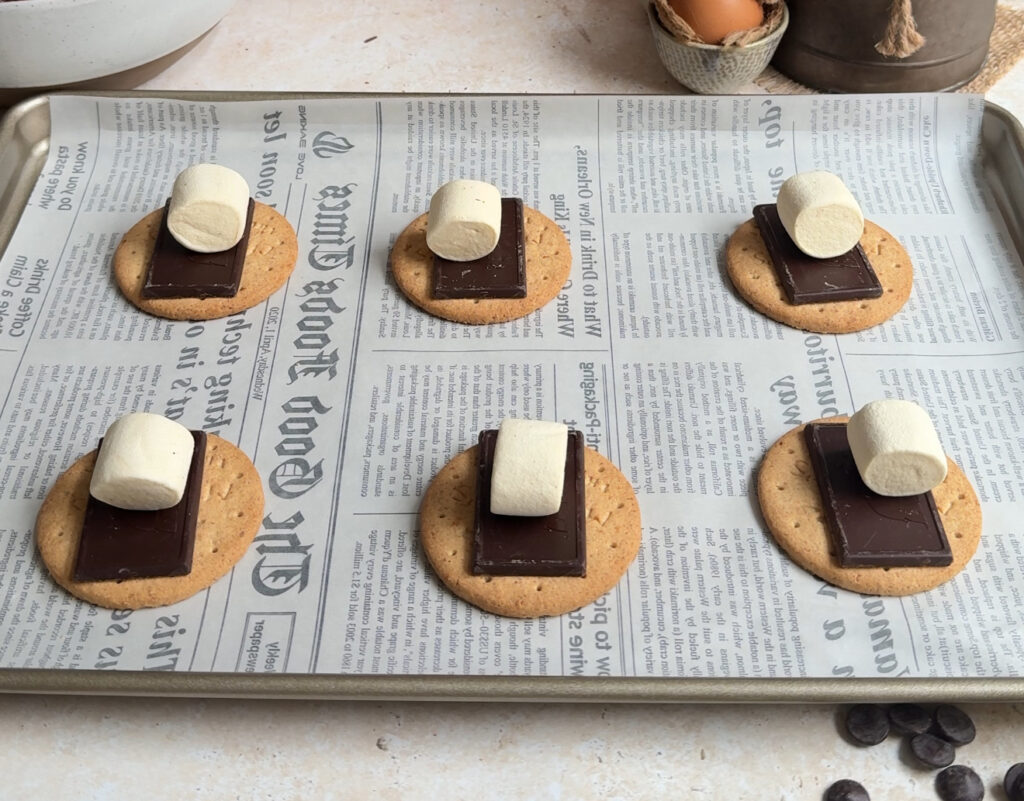
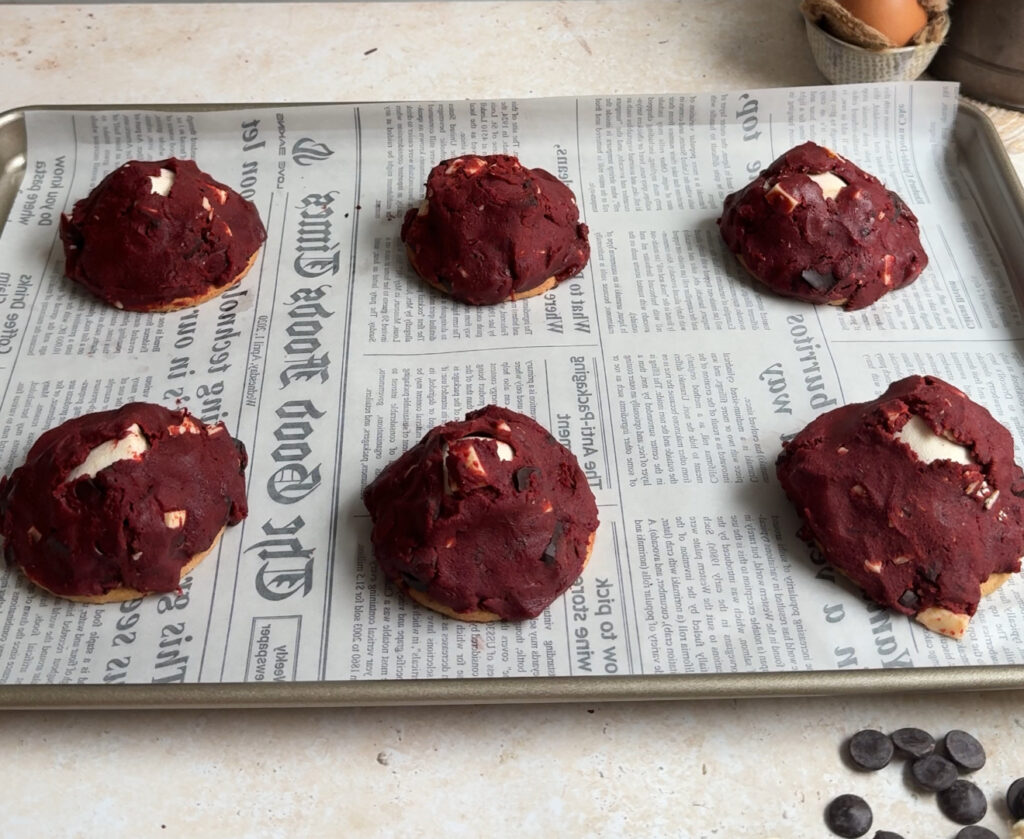
Step 7: Assemble the Cookies
After chilling the dough, line a baking tray with parchment paper. Place a graham cracker or digestive biscuit on the tray, leaving about 2–3 inches between each. On top of each biscuit, add a piece of chocolate and a piece of a large marshmallow. Then scoop a ball of cookie dough, flatten it slightly, and place it over the chocolate and marshmallow. If you like, leave a little peek so the marshmallow shows through — it makes the cookies look perfectly toasty and irresistible!
Step 8: Bake the Cookies
Preheat your oven to 180°C (350°F) and bake the cookies for 9–11 minutes. They’re done when the edges are set, the centers are still soft, and the tops are no longer shiny. Slightly underbaking them is perfect — it keeps the center gooey and soft.
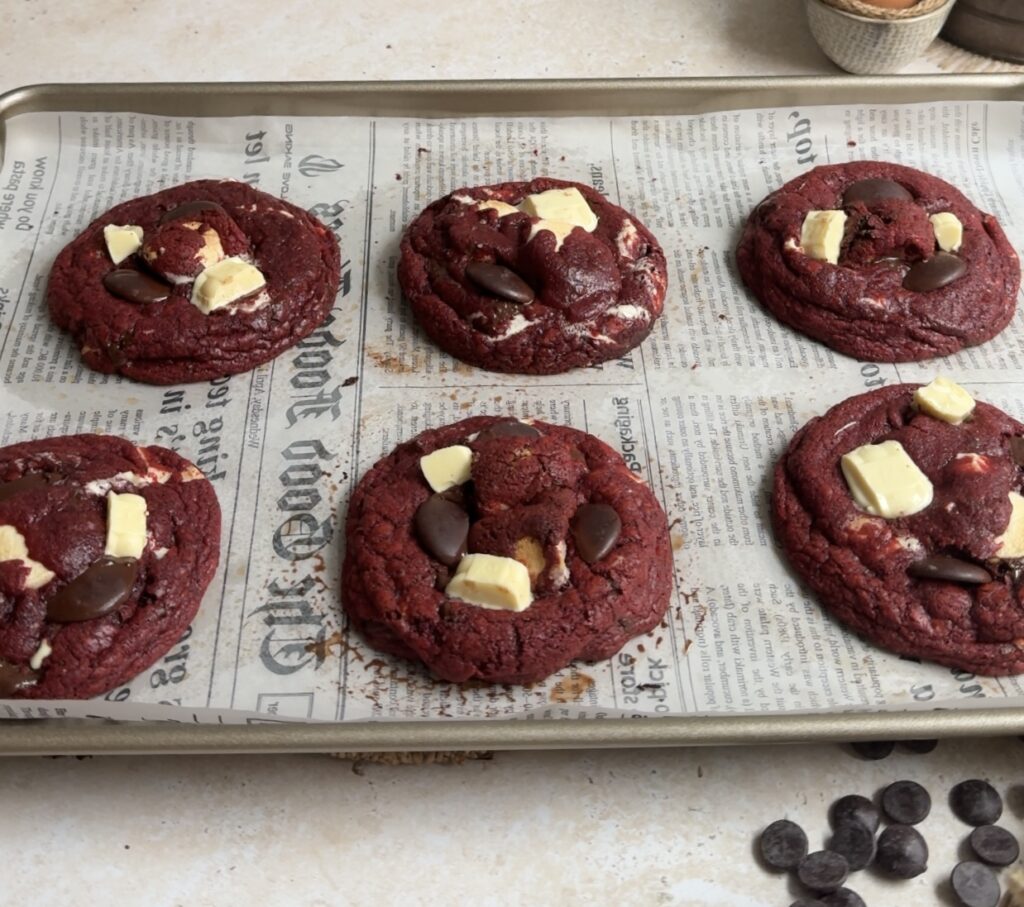
Step 9: Shape and Add Extra Goodness
Once the cookies are out of the oven, let them cool on the tray for a few minutes. While they’re still warm, you can gently shape them with a bowl or spoon and press in a few extra chocolate chunks, this gives that melty, indulgent look. Then let them finish cooling on a wire rack (or grab one immediately if you can’t resist!).
Frequently Asked Questions
Can I freeze the cookie dough?
Yes! Scoop the dough into balls and freeze them on a tray for 1–2 hours. Then transfer to a freezer bag for up to 3 months. You can bake them straight from frozen, just add 1–2 extra minutes to the baking time.
How should I store the baked cookies?
Store cooled cookies in an airtight container at room temperature for up to 3 days. For longer storage, you can freeze the baked cookies for up to a month — just warm them slightly before serving for that melty effect.
Can I omit the red food colouring?
Absolutely! Your cookies will still taste amazing — they’ll just be more of a chocolate s’mores colour than bright red.
Can I use other biscuits instead of digestive or graham crackers?
Yes! You can use plain cookies, shortbread, or even chocolate biscuits. Digestive or graham crackers give the classic s’mores crunch, but feel free to experiment.
Watch How to Make it!
Press play to see this recipe step by step. And don’t forget to subscribe for more baking videos!
Recipe Card
Red Velvet S'mores Cookies
Ingredients
- 113g (½ cup) butter, softened or browned
- 100g (½ cup) soft brown sugar
- 50g (¼ cup) fine white sugar
- 1 large egg, room temperature
- 1 tsp vanilla extract
- 155g (1¼ cups) all-purpose flour
- 1½ tbsp cocoa powder
- ½ tsp baking soda
- ¼ tsp baking powder
- ½ tsp cornstarch
- ½ tsp salt
- ¾ tsp red gel food coloring (optional)
- 125–150g (½–⅔ cup) chocolate, chopped (mix of white and dark)
- Marshmallows as desired
- Digestive biscuits or graham crackers
Instructions
- Brown the butter over medium heat, stirring frequently. Once browned, transfer to a heat proof bowl. Let it cool slightly before adding sugar.
- Add brown and white sugar and mix.
- Add the room-temperature egg and vanilla extract and whisk until combined. Now add the red gel food colouring and mix until evenly combined.
- In a separate bowl, whisk together the flour, cocoa powder, baking soda, baking powder, cornstarch, and salt.
- Gradually fold the dry ingredients into the wet mixture until just combined, being careful not to over mix.
- Fold in the chopped chocolate chunks. Chill the dough in fridge for 30 minutes.
- Line a baking tray with parchment paper. Place a digestive biscuit or graham cracker 2–3 inches apart on the tray. Top each with a piece of chocolate and a marshmallow. Scoop a ball of dough, flatten slightly, and place on top, leaving a little peek of marshmallow visible.
- Bake in a preheated oven at 180°C (350°F) for 9–11 minutes, until the edges are set, the centers are soft, and the tops are no longer shiny. Slightly underbaking is ideal for a gooey centre.
- Let cookies cool on the tray for a few minutes. While warm, gently reshape and press in extra chocolate chunks if desired.
- Transfer to a wire rack to cool completely before storing or serving.
Notes
- Slightly underbaking keeps the centers soft and gooey.
- Every oven behaves different, I recommend test one cookie first.
- I recommend using gram measurements. If you don't have kitchen scale , fluff up your flour and fill the measuring cup with spoon for better measurement.
- Store cooled cookies in an airtight container at room temperature for up to 3 days.
If you like Cookie recipes like these, you should definitely check out my:
1) Brown Butter Chocolate Chip S’mores Cookies
2) Brown Butter S’mores Cookies

One Comment