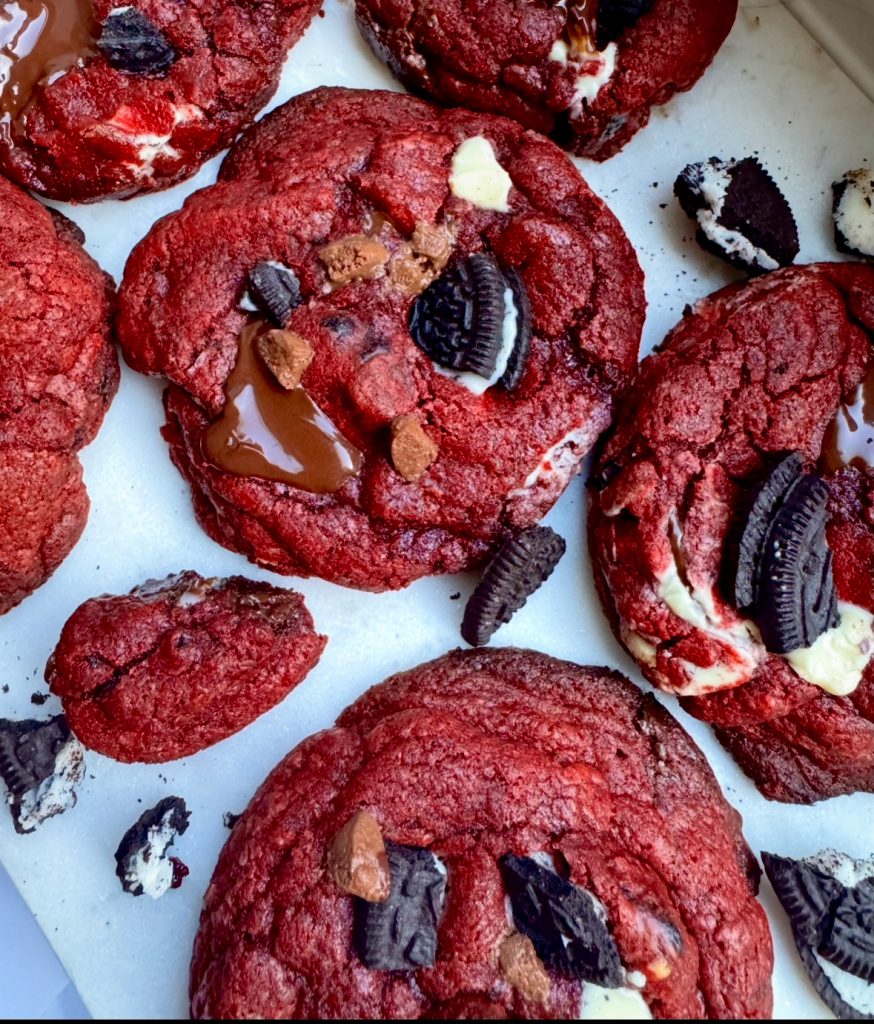
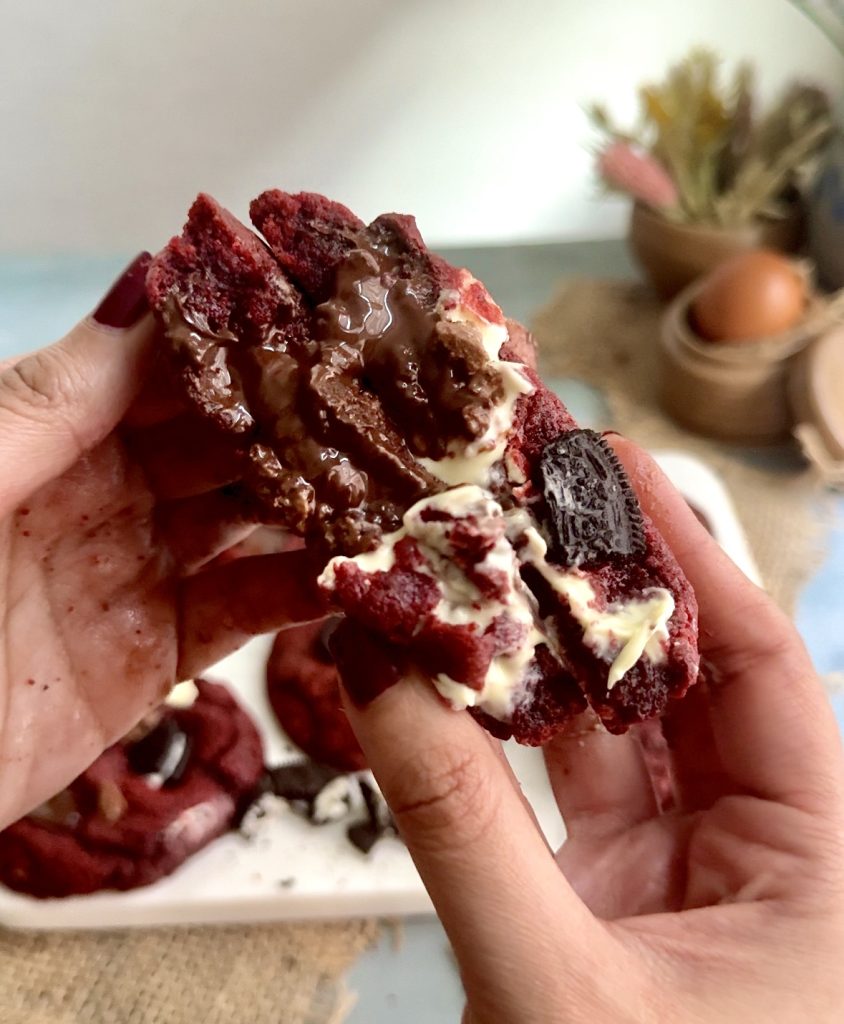
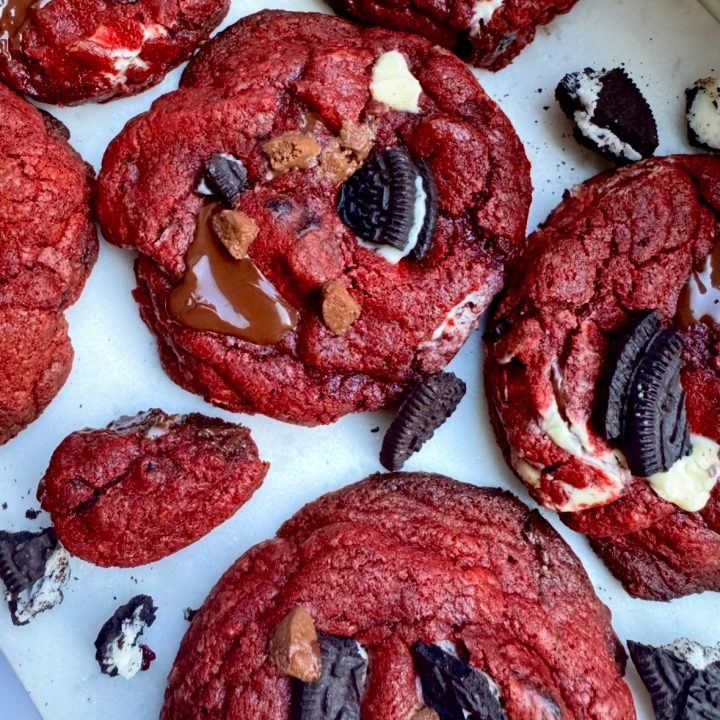
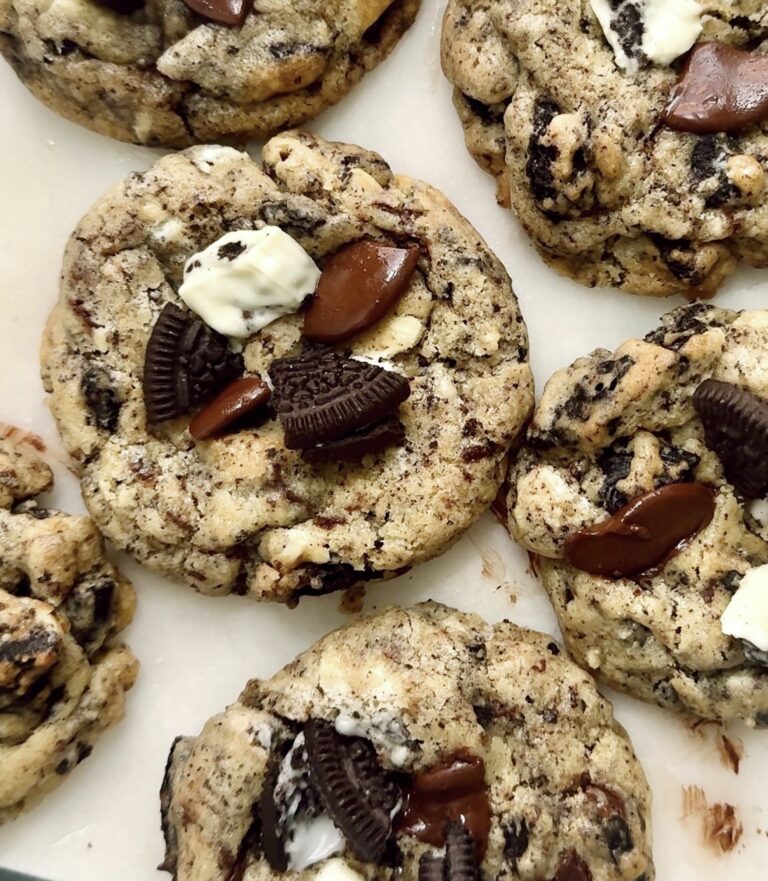
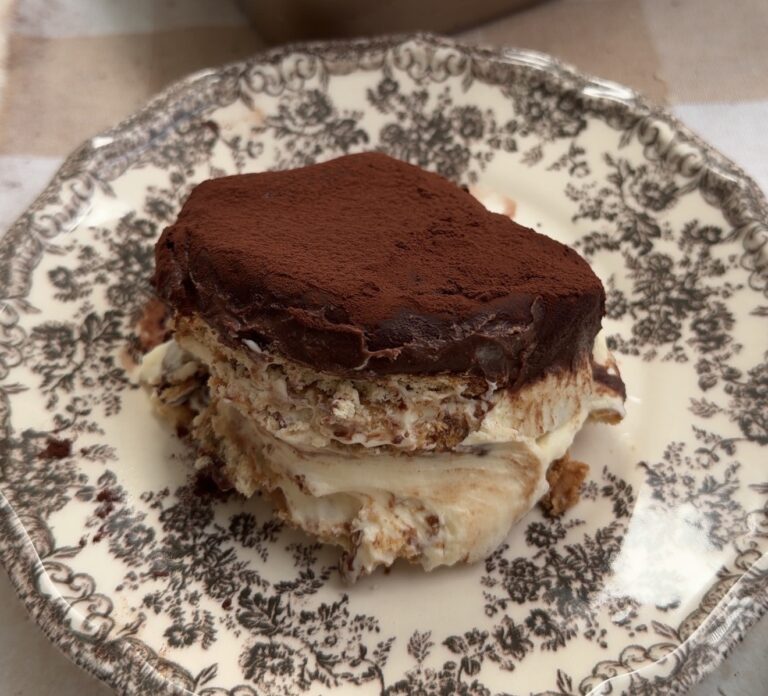
These NYC Style Red Velvet Cookies are thick, chewy and super soft. And to make it extra fun, I have added chunks of Oreos too! They’re massive with big chunks of chocolate that melt perfectly in the oven. The centre is soft and gooey, almost like it’s just waiting for you to take that first bite.
Why you will love this recipe?
If you love a cookie that’s crispy on the outside and soft and gooey on the inside, then you are going to absolutely adore these NYC style red velvet cookies. The moment you bite into one, you’ll experience that perfect combination of a golden-brown crust and a melt-in-your-mouth, chewy centre that just oozes with dark and white chocolate puddles. I have taken these cookies to parties, to kids school and I always get amazing reviews on this one!
Expert Tips for Best results!
- Measure the flour correctly – I highly recommend using a kitchen scale for accuracy. If you add too much flour, your cookies will turn out dry and cakey instead of thick and gooey. If measuring with cups, use the spoon and level method, never scoop directly from the bag.
- Use cold butter – Cold butter is the secret to thick cookies that don’t spread too much. It helps create that crispy edge while keeping the centre soft and gooey. If you use softened butter, the cookies will spread more and lose their chunky bakery-style shape.
- Don’t overmix the dough – After the butter is beaten, whisk the remaining ingredients only until they’re just combined. Overmixing can make the cookies tough and change their texture.
- Make giant cookie dough balls – To get that thick, chunky look, weigh each dough ball to around 100g. Shape them into tall cylinders rather than round balls. This helps them bake evenly while keeping the centre gooey.
- Bake at a high temperature – Baking at 200°C (400°F) creates the perfect contrast, crispy top and bottom with a soft, gooey middle. The high heat allows the edges to set quickly while keeping the inside deliciously fudgy. Once the edges look set, they’re done.
How to make NYC Style Red Velvet Cookies?
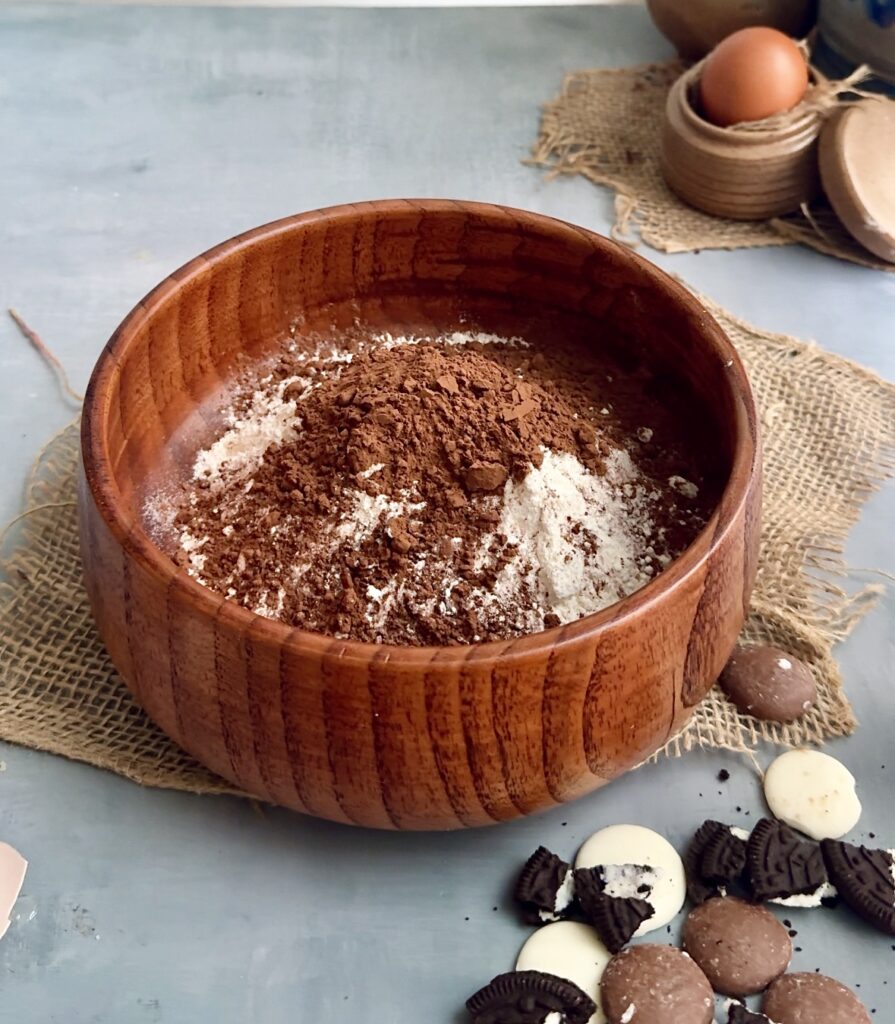
Step 1: Mix Dry Ingredients
In a large bowl, combine the all-purpose flour, cocoa powder, corn starch, baking soda, baking powder, and salt. Set aside.
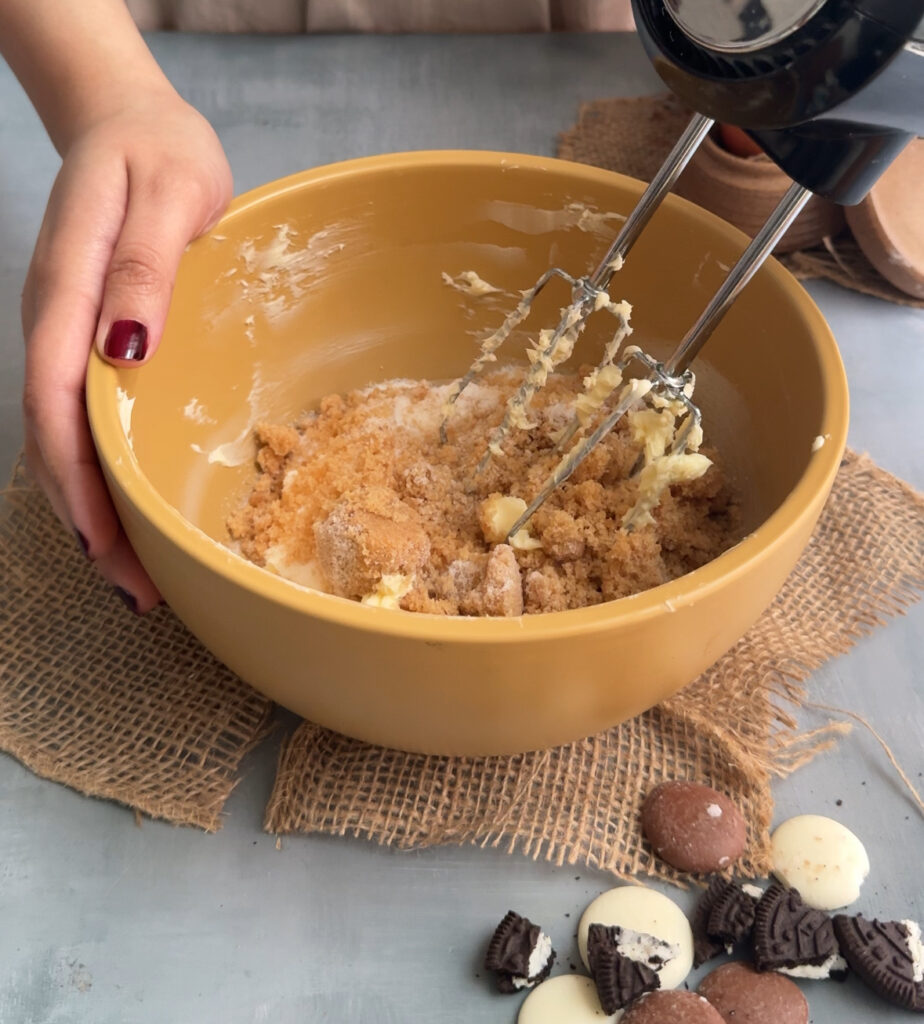
Step 2: Beat the Butter
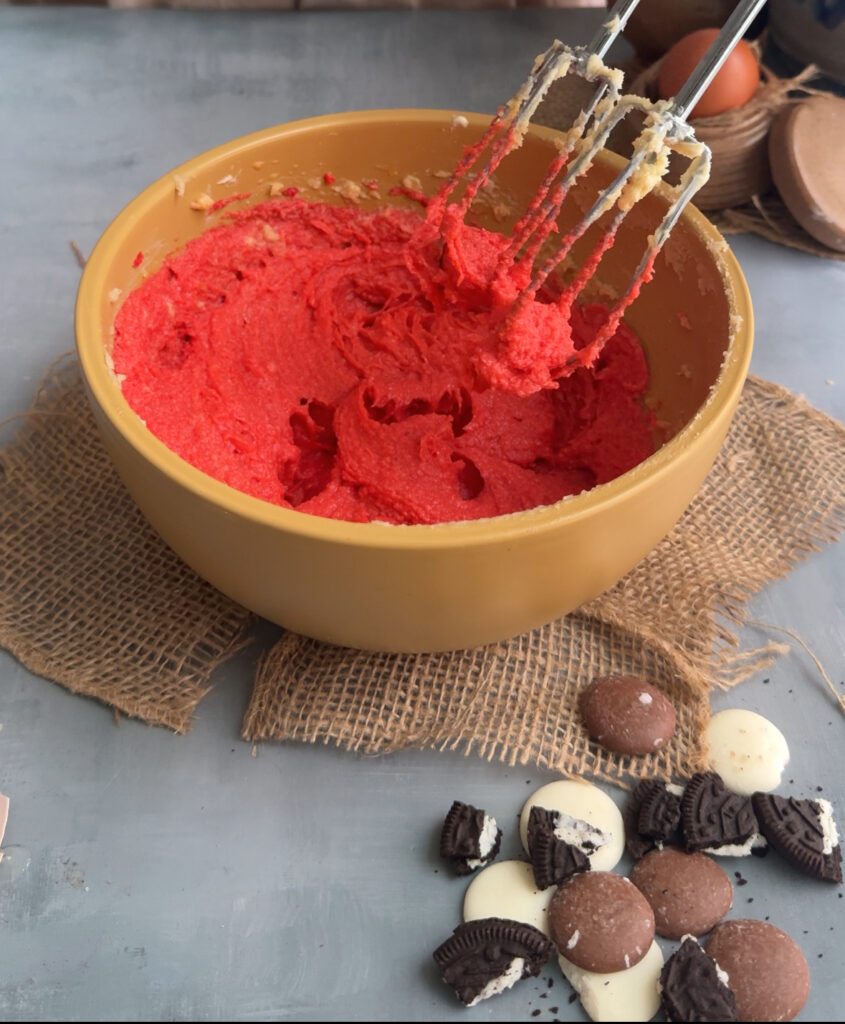
In another large bowl, add the cubed butter and beat with an electric mixer until light and fluffy, about 2-3 minutes.
Step 3: Mix in the Sugars
Add the brown sugar and caster sugar to the butter. Whisk until the sugars are fully combined and the mixture is smooth.
Step 4: Add Wet Ingredients
Add the egg, egg yolk, vanilla extract, and red food colouring to the butter mixture. Whisk everything together until smooth and well combined.
Step 5: Combine Wet and Dry Ingredients
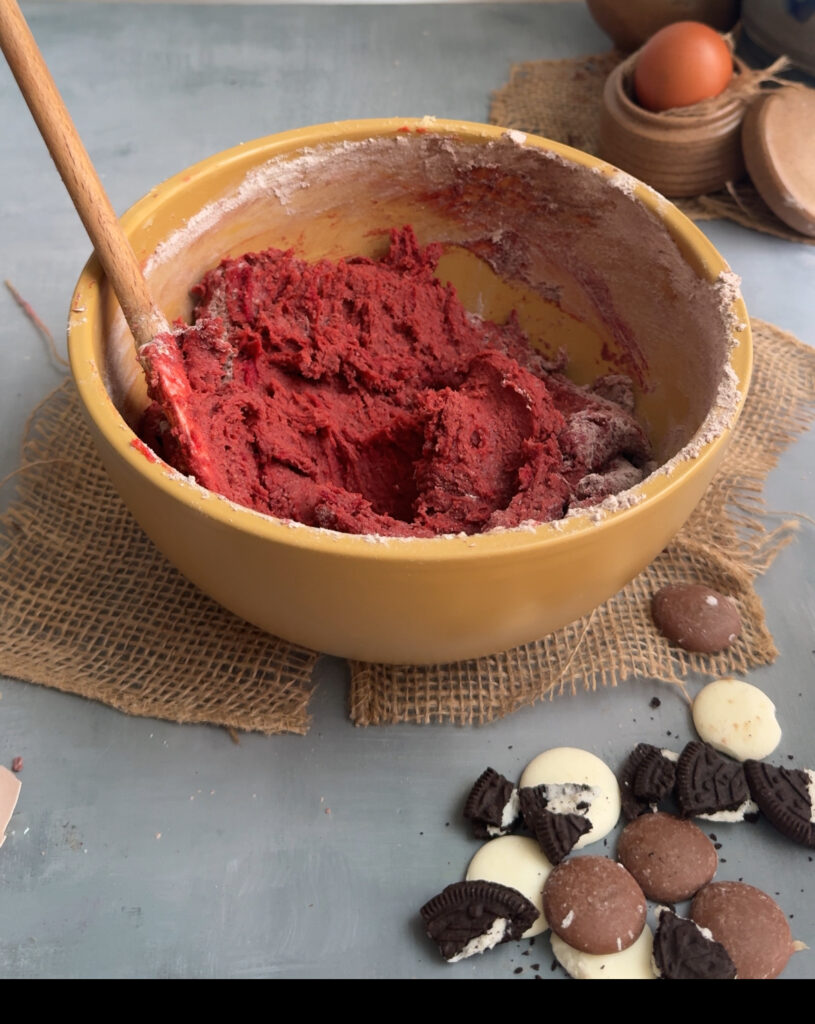
Add the dry ingredients (flour, cocoa powder, corn starch, baking soda, baking powder, salt) to the wet ingredients. Gently fold with a spatula until you see just a bit of flour remaining.
Step 6: Add Chocolate & Cookies
Fold in the chopped dark and white chocolate chunks and the cookies & cream pieces.
Step 7: Shape and freeze the Dough
Using your hands, shape the dough into 100g cookie dough balls. Form them into tall, cylindrical shapes, but make sure not to make them too tall! A height just slightly taller than wide works best. Now freeze the dough for at least 2 hours.
Step 8: Bake the Cookies
Once the dough has frozen, place the dough balls on a lined baking tray, spaced about 3 inches apart. Bake for 10-12 minutes at 200C, or until the tops are set, and the edges are golden, while the centre remains soft. Let them set on the baking tray for 15-20 minutes before serving.
Frequently Asked Questions
Why didn’t my cookies spread?
If your cookies didn’t spread properly, there could be a few reasons. First, check if your baking soda is fresh, expired baking soda won’t help the cookies rise and spread. Another common issue is adding too much flour. Always measure accurately using a kitchen scale. Lastly, be careful not to over mix the dough. Overmixing develops too much gluten, making the cookies dense and limiting their ability to spread.
Can I make these ahead of time?
Yes! You can make the cookie dough ahead and chill it in the fridge for up to 24 hours before baking.
Can I freeze the cookie dough?
Absolutely! Shape the dough into balls, place them on a tray, and freeze for about an hour. Once firm, transfer them to a zip lock bag and store them in the freezer for up to 15 days. When baking from frozen, just add a minute or two to the baking time.
How do I know when my cookies are done?
The first sign is that the dough spreads and the cookie forms its shape. The surface should no longer look shiny, and the edges will start turning slightly golden. When you gently touch the centre, it should still feel soft, don’t be tempted to overbake, as the cookies will continue to set as they cool.
Watch How to Make These!
Press play to see this recipe step by step. And don’t forget to subscribe for more baking videos!
Recipe Card
NYC STYLE RED VELVET COOKIES
These NYC-style Red Velvet Cookies are thick, chewy, and loaded with white and dark chocolate chips plus crunchy Oreo pieces. With a signature red hue and a soft, gooey centre, they’re the ultimate bakery-style treat, crisp on the edges, fudgy inside, and irresistibly delicious!
Ingredients
- 2/3 cup unsalted butter (159g) (cold, chopped into cubes)
- 1/3 cup caster sugar (70g)
- 1 & 1/2 cup + 2 tbsp (126g) soft brown sugar
- 1 large egg + 1 egg yolk
- 2 tsp vanilla extract
- 1 & 1/2 tsp red food colouring
- 1 & 1/2 cup + 2 tbsp flour (204g)
- 3 tbsp corn starch
- 3 tbsp cocoa powder (18g)
- 1/2 tsp baking soda
- 1/2 tsp baking powder
- 1/2 tsp salt
- 1/2 cup chopped semi sweet chocolate (100g)
- 1/3 cup white chocolate chunks (75g)
- 1/4 cup crushed oreo pieces
Instructions
- In a bowl, sift together the flour, cocoa powder, corn starch, baking soda, baking powder, and salt. Set aside.
- In a large bowl, add the cubed butter and beat with an electric mixer until light and fluffy.
- Add the brown and white sugar and mix until well combined.
- Add the egg, egg yolk, vanilla extract, and red food colouring, then whisk until fully incorporated.
- Gradually add the dry ingredients to the wet ingredients, gently folding until just a few streaks of flour remain.
- Add the chopped chocolate and crushed Oreos, then fold until no flour streaks are visible.
- Scoop 100g portions of cookie dough and shape them into short, tall cylinders. Avoid making them too tall, as they may tip over while baking.
- Place the cookie dough balls on a tray and freeze for 1.5 hours.
- Preheat the oven to 200°C (392°F). Arrange the chilled cookie dough balls at least 3 inches apart on a lined baking sheet. Bake for 10-12 minutes, until the edges are set and the centres remain soft.
- Let the cookies rest on the baking sheet for 15-20 minutes before enjoying.
Notes
If you are a Cookie fan like me, you should definitely try these cookie recipes:
- Double Chocolate Chip Cookies
- Red Velvet S’mores Cookies
- Fudgy Brownie Cookies
- Bakery Style Brown Butter Chocolate Chip Cookies
I tried this red velvet cookie recipe and was honestly blown away by how good they turned out. The cookies had that perfect balance of soft and chewy with just slightly crisp around the edges. The flavor was rich and chocolatey with that classic red velvet hint, and the color came out beautifully vibrant.
What really made them stand out was how moist they stayed even the next day !
The recipe was easy to follow and didn’t require anything complicated, which made the whole process even more enjoyable.
If you are a fan of red velvet , you won’t be disappointed!!
Thankyou so much Claudia!
Hey! Before I do this, does it have to be gel red food colouring or just liquid?
U CAN USE ANY, BUT GEL COLOR IS MORE VIbRANT