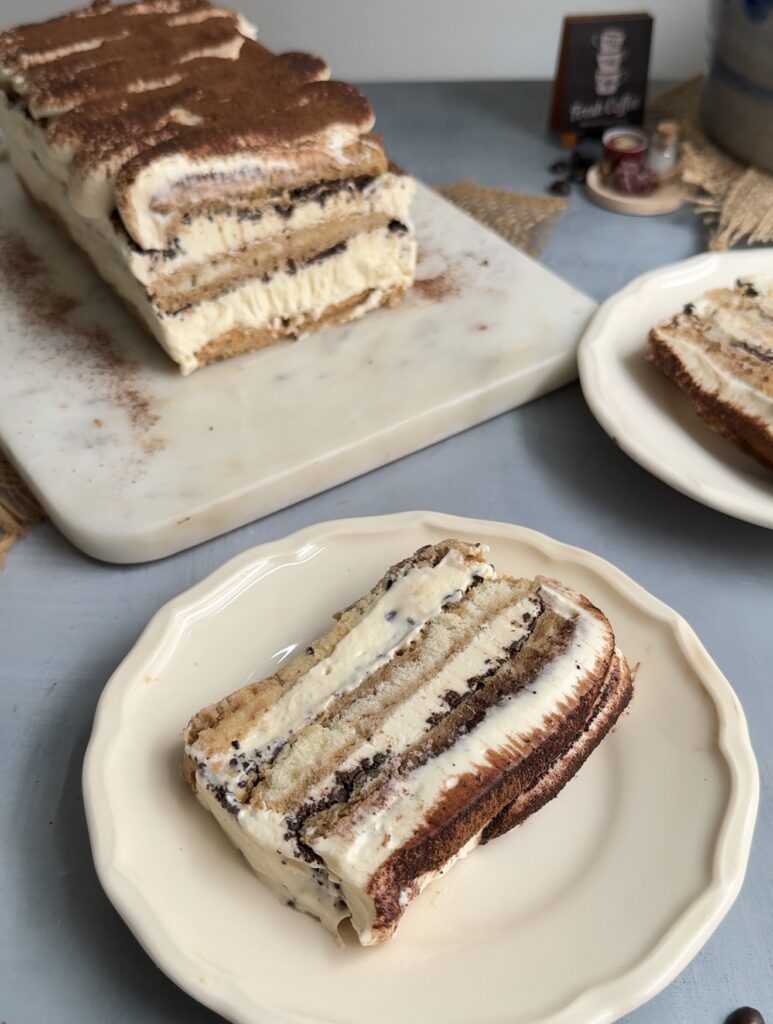
This Tiramisu Ice Cream is a rich dessert layered with coffee-soaked ladyfingers, smooth mascarpone cream, and a dusting of cocoa. This easy tiramisu ice cream recipe delivers classic coffee flavours with a soft, scoopable texture, making it the perfect make-ahead dessert for anyone who loves a good coffee tiramisu ice cream.
Why you will love this recipe?
This Tiramisu Ice Cream has a perfectly balanced texture that is creamy yet light, thanks to the whipped mascarpone base. Unlike regular ice cream, this no-churn tiramisu ice cream includes layers of ladyfingers that add a depth of flavour. It is also an easy tiramisu ice cream recipe that sets beautifully in the freezer, making it ideal for serving guests or preparing ahead.
Expert Tips for Best Results!
- Whip the cream to the right stage – Start whipping until the cream thickens, then stop at medium to slightly stiff peaks after adding mascarpone and condensed milk. This ensures a smooth and airy ice cream texture.
- Use cold ingredients for better texture – Make sure the heavy cream and mascarpone are cold before whipping so the mixture whips up properly and holds structure.
- Layer evenly for balanced flavour – Spread each layer of the cream mixture evenly so every slice has a good balance of coffee-soaked biscuits and creamy filling.
- Dip ladyfingers quickly in coffee – Quickly dip the ladyfingers into the hot coffee so they absorb flavour without becoming too soft or soggy.
- Do not skip resting before serving – Let the ice cream sit at room temperature for a few minutes before slicing. This makes it easier to cut and improves the texture.
How to make Tiramisu Ice cream?

Step 1: Whip the creamy base
First, in a large mixing bowl, whip the heavy whipping cream until it starts to thicken. For a deeper coffee flavour, you can add a little instant coffee powder at this stage while whipping.
Step 2: Create the mascarpone mixture
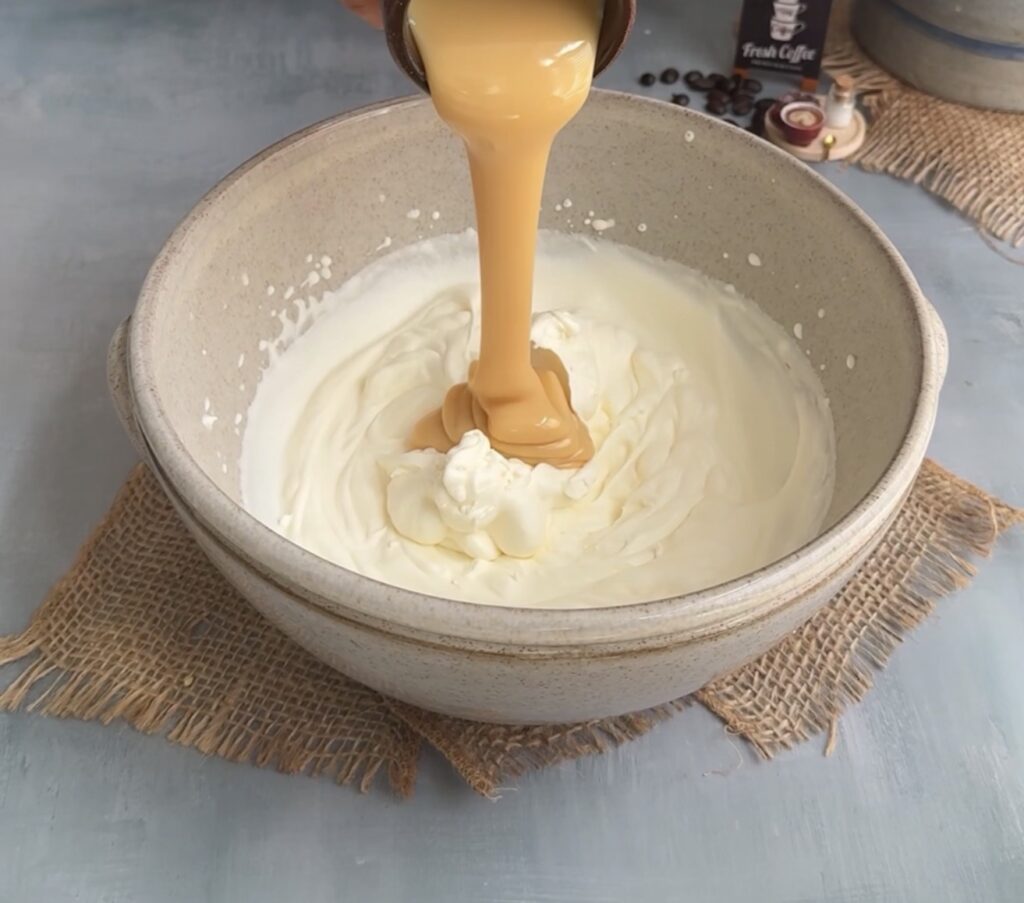
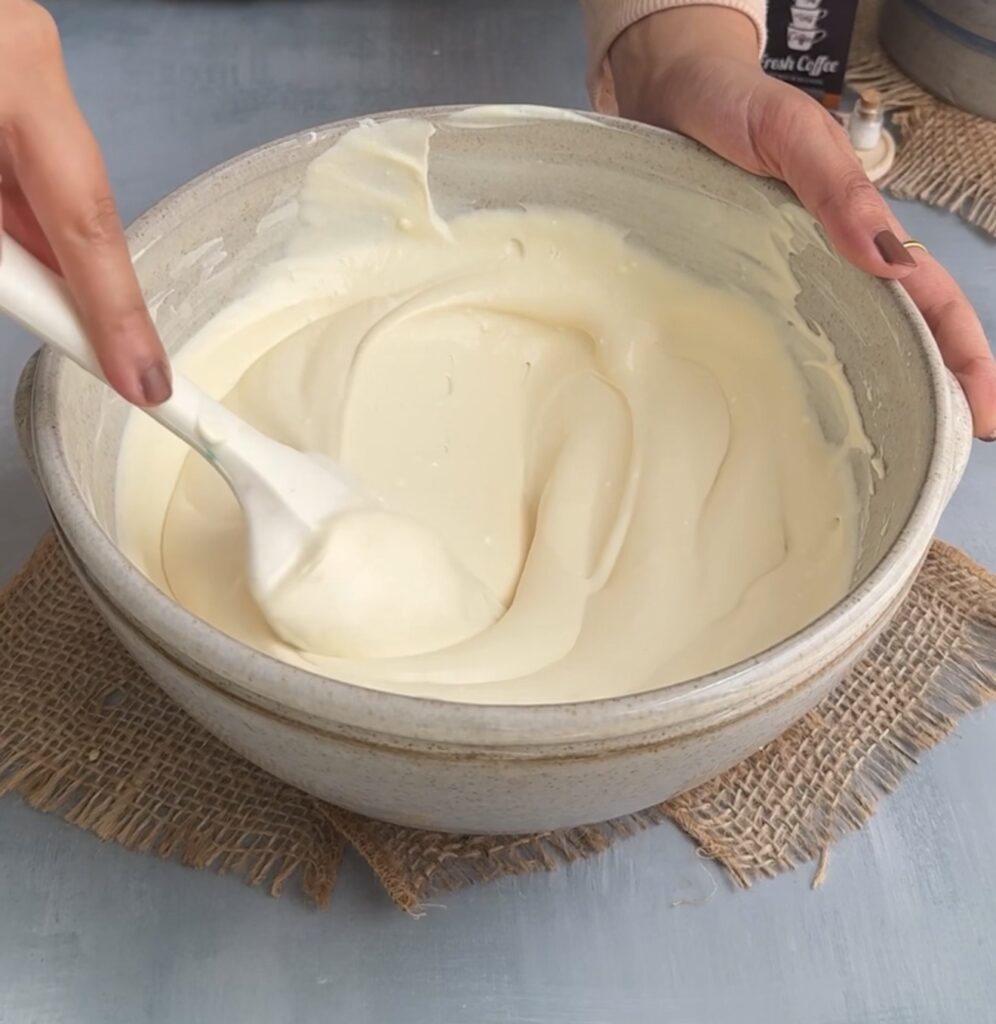
Next, add the mascarpone cheese and sweetened condensed milk to the whipped cream. Continue whipping until the mixture reaches medium to slightly stiff peaks and becomes smooth, creamy, and airy.
Step 3: Prepare the coffee mixture
Meanwhile, prepare the strong hot coffee by mixing instant coffee powder with hot water. Keep it warm so the ladyfingers soak evenly and absorb maximum flavour.
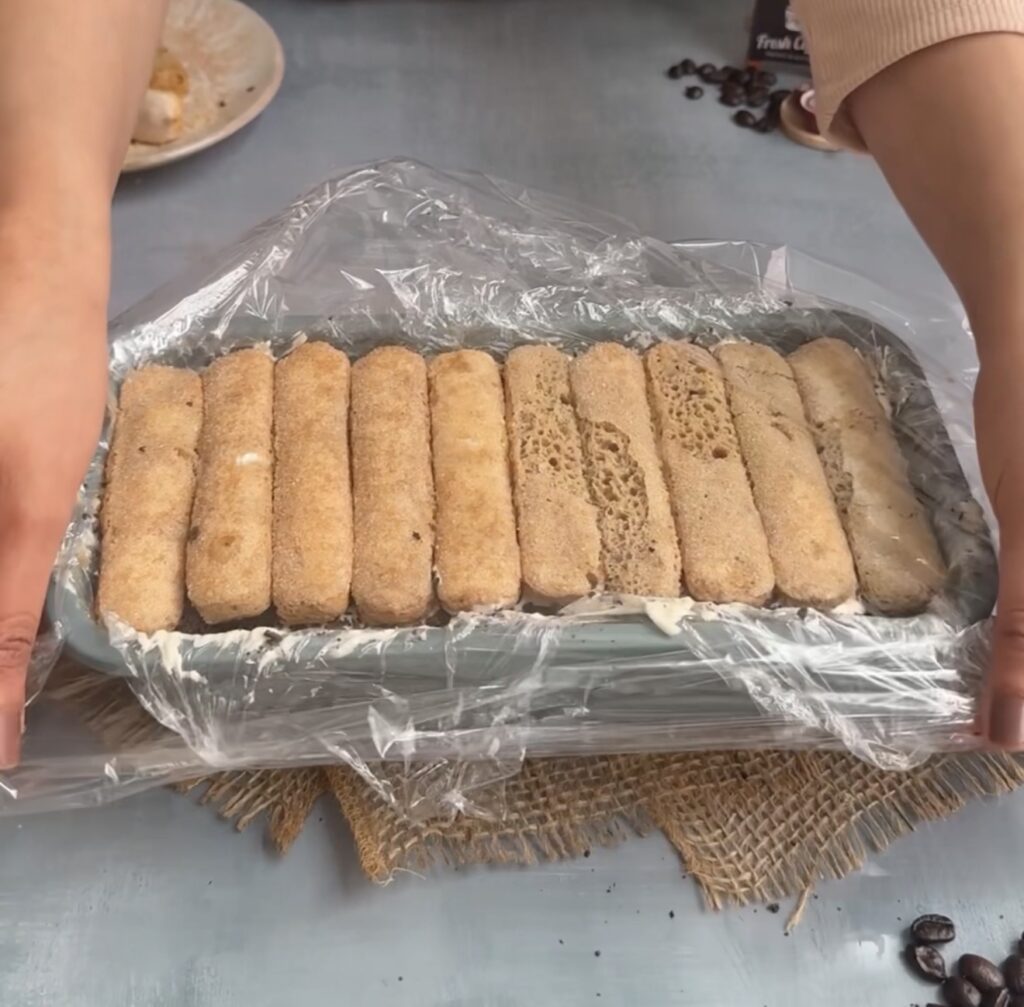
Step 4: Line the pan properly
Then, line a 9-inch loaf pan with cling wrap, leaving enough overhang on the sides to easily lift the ice cream out later.
Step 5: Start layering the base
Now, quickly dip each ladyfinger into the hot coffee and arrange them in a single layer at the bottom of the pan to create the base.
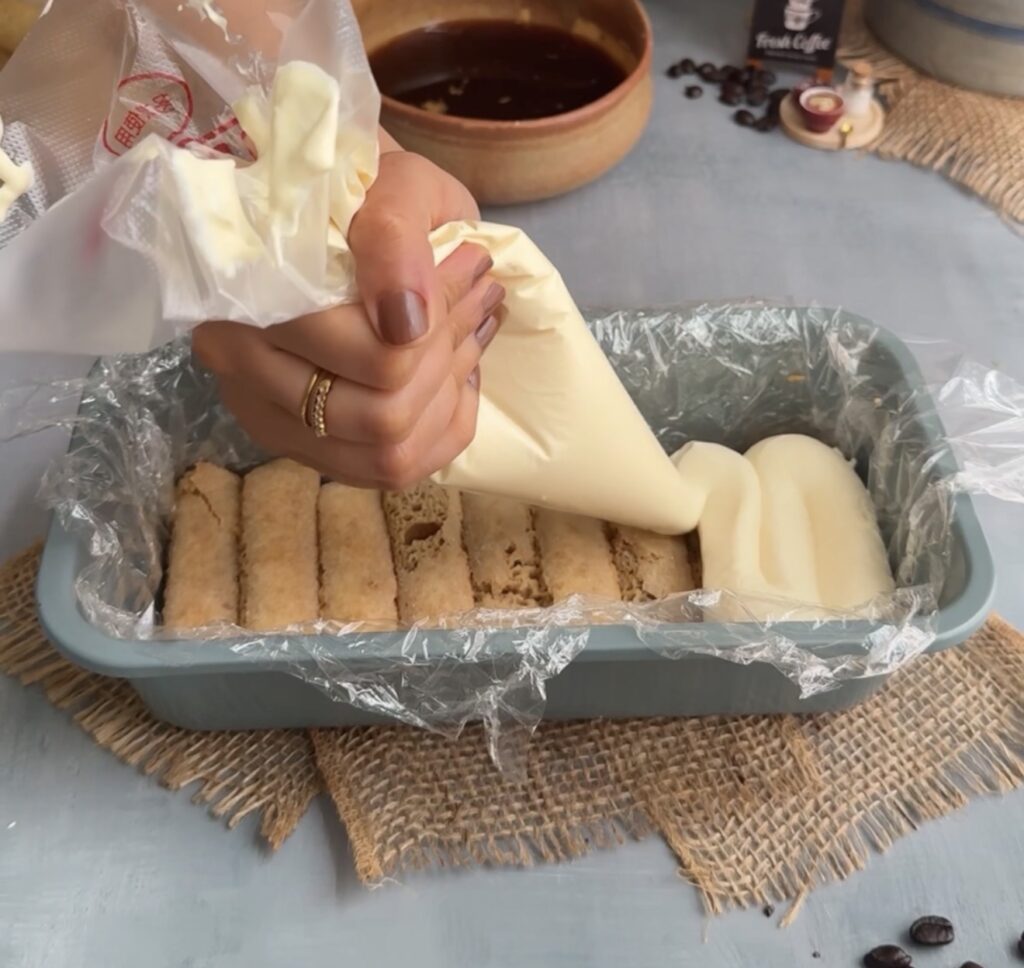
Step 6: Add the cream layer
Spoon over a generous layer of the cream mixture, spreading it evenly for a smooth and balanced layer.
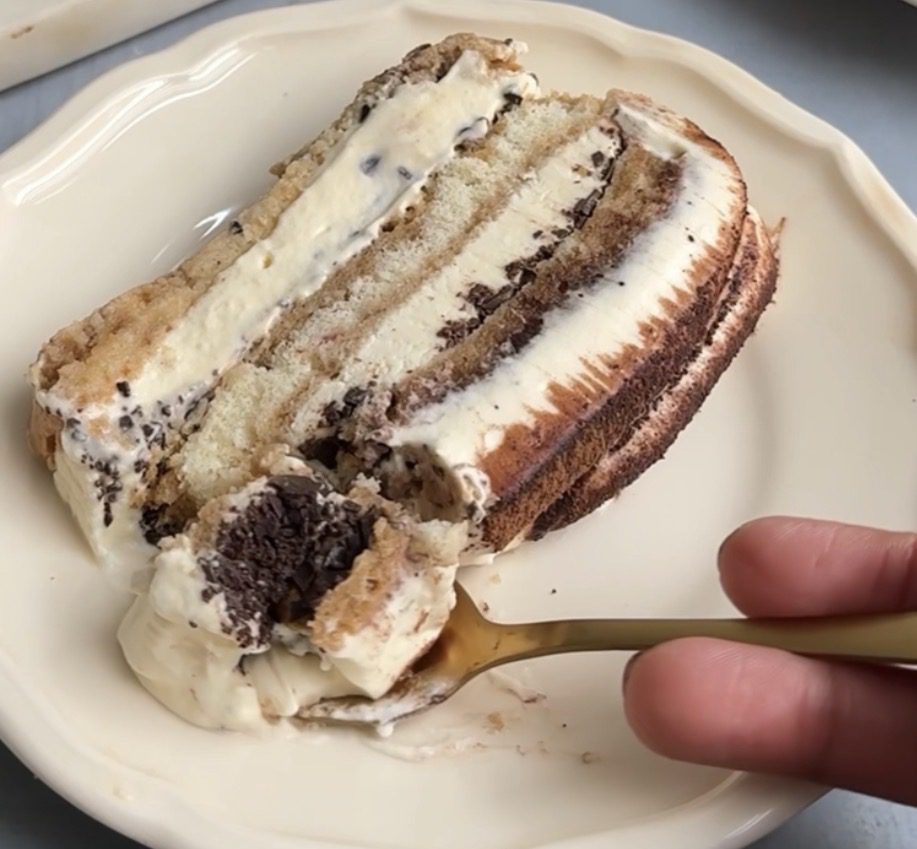
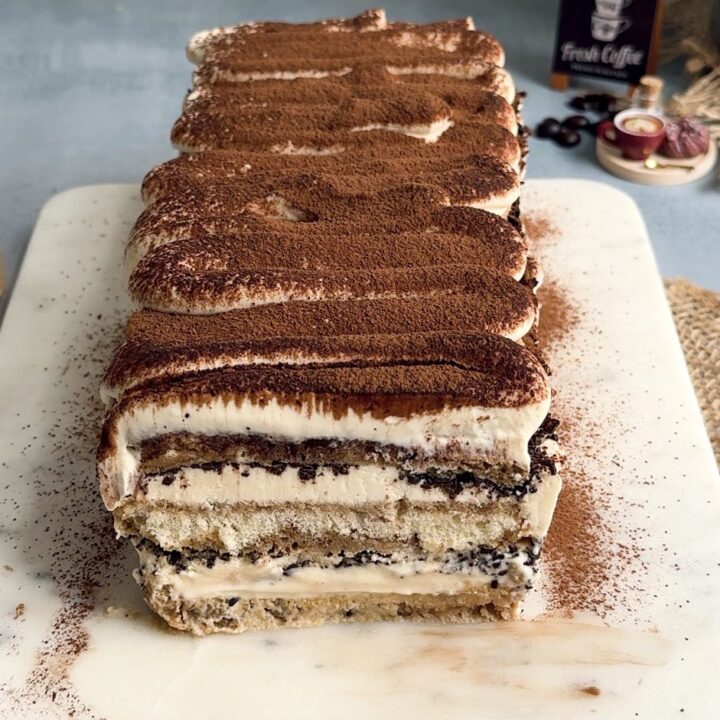
Step 7: Add texture and repeat layers
Sprinkle some crushed chocolate chunks, then repeat the layering process with dipped ladyfingers, cream mixture, and chocolate chunks. Finish with a final layer of ladyfingers.
Step 8: Reserve some cream for topping
Before finishing, set aside a small portion of the cream mixture in the fridge to use later for a fresh and smooth topping.
Step 9: Freeze until firm
Cover the top with cling wrap and freeze the dessert for at least 8 hours or overnight until fully set and firm.
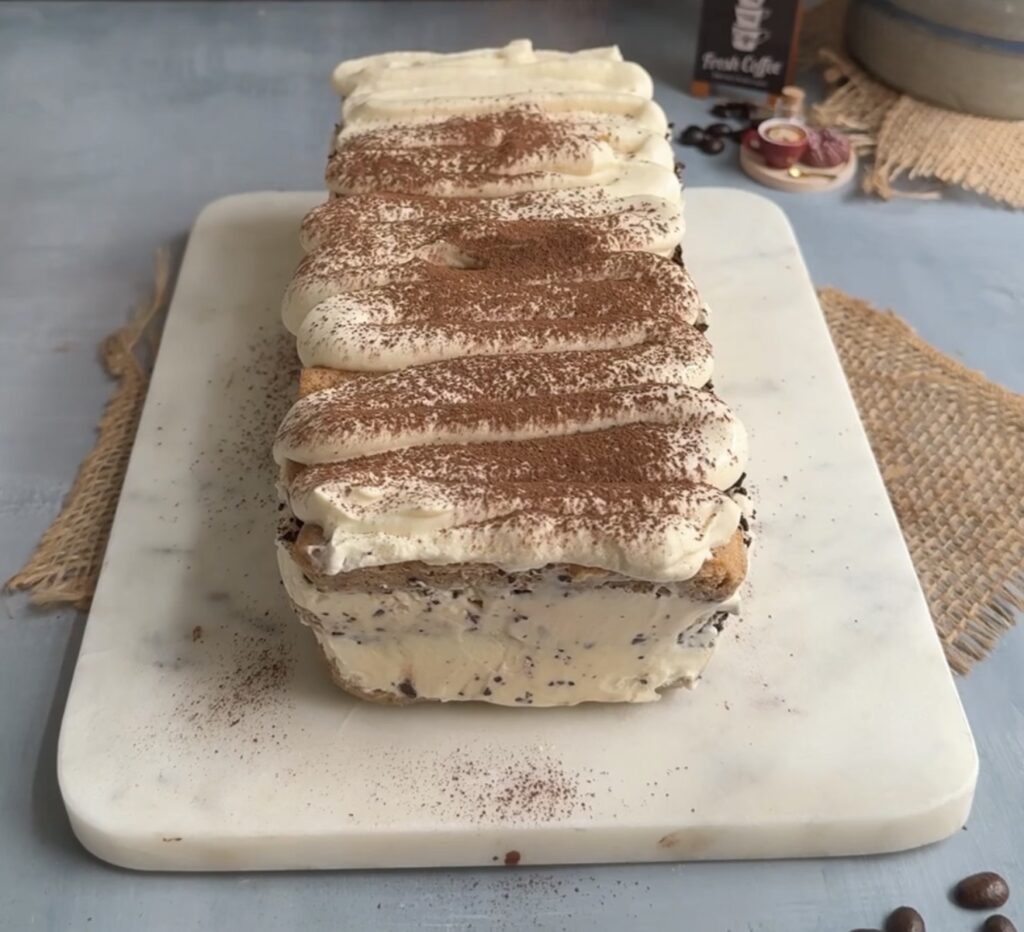
Step 10: Finish and serve
Finally, let the ice cream sit at room temperature for about 5 minutes before serving. Spread the reserved cream on top and dust generously with cocoa powder for a classic tiramisu-style finish.
Frequently Asked Questions
Can I adjust the sweetness of this ice cream?
Yes, you can adjust the sweetness by slightly reducing or increasing the sweetened condensed milk according to your taste.
Can I make the coffee flavour stronger?
Yes, you can add instant coffee powder to the cream while whipping or slightly increase the strength of the coffee used for dipping.
Why are my layers too soggy?
This usually happens if the ladyfingers are soaked too long. Dip them quickly in the coffee to keep the right texture.
How do I get clean slices when serving?
Let the ice cream sit for about 5 minutes at room temperature, then slice with a sharp knife for cleaner cuts.
Why is my ice cream texture not smooth?
If the mixture is overwhipped after adding mascarpone, it can turn slightly grainy. Whip just until medium stiff peaks form for a smooth and creamy consistency.
Watch How to Make it!
Press play to see this recipe step by step. And don’t forget to subscribe for more baking videos!
Recipe Card
Tiramisu Ice cream
This Tiramisu Ice Cream is a no-churn frozen dessert made with layers of coffee-soaked ladyfingers and a light mascarpone cream. Smooth, creamy, and full of rich coffee flavour, it’s an easy make-ahead treat that brings the classic taste of tiramisu into a refreshing ice cream form.
Ingredients
- 1 & 1/3 cup heavy whipping cream (300ml)
- 1/4 cup mascarpone cheese (60g)
- 1 & 1/2 cup sweetened condensed milk (adjust to taste)
- 1 tbsp good-quality vanilla extract
- 1 & 1/2 cup strong hot coffee (made by mixing 1 & 1/2 cup hot water with 2 tbsp instant coffee powder)
- Ladyfingers (as required)
- Crushed chocolate chunks for layering (optional)
- Cocoa powder (for dusting)
Instructions
- First, whip the heavy whipping cream until it starts to thicken. For a stronger coffee flavour, you can add a little instant coffee powder while whipping.
- Next, add the mascarpone cheese and sweetened condensed milk, then whip until smooth and the mixture reaches medium to slightly stiff peaks, creating a creamy tiramisu ice cream base.
- Meanwhile, prepare strong hot coffee by mixing instant coffee powder with hot water. Keep it warm for better absorption.
- Then, line a loaf pan with cling wrap, leaving some overhang to easily lift the tiramisu ice cream later.
- Now, quickly dip the ladyfingers into the coffee and arrange a layer. Add a layer of the cream mixture, sprinkle chocolate chunks, and repeat the layers to build your no-churn tiramisu ice cream.
- Cover the pan and freeze the tiramisu ice cream for at least 8 hours or overnight until fully set.
- Finally, let the tiramisu ice cream sit at room temperature for a few minutes, spread the reserved cream on top, dust with cocoa powder, and serve.
If you like Tiramisu style recipes like these, you should definitely check out my:
1) Tiramisu Icebox Cake
2) Hot Chocolate Tiramisu